“Because nobody should feel dumb staring at a lifeless jar of flour and water.”
I’ve burned bread. I’ve forgotten feedings. I’ve cried over jars that smelled like gym socks and looked like pond scum.
So trust me when I say: you’re not alone.
When I started learning about sourdough, I felt like I’d landed in another universe. Ratios? Hydration percentages? Feeding schedules? It felt more like chemistry than baking. And that little jar on my counter? It just sat there, doing a whole lot of nothing.
But once I stopped overthinking it—and started paying attention to a few key fundamentals—it all clicked.
In this guide, I’ll show you how to start (and actually succeed with) your sourdough starter, even if:
You’ve never baked a loaf in your life
You think you “killed” your starter (you probably didn’t)
You have no time, no scale, and no idea what hooch is
We’ll cover:
What a sourdough starter actually is (and why you need one)
How to create one from scratch, step by step
How to feed, store, and troubleshoot it
What to do with all that discard
Real stories, mistakes, and lessons learned
So grab a jar, some flour and water, and let’s start from square one—the right way.
Table of Contents
What Is a Sourdough Starter?
If you’ve ever read a sourdough recipe and wondered, “Wait, what exactly is a starter?” — you’re not alone.
A sourdough starter is a living culture of flour and water that naturally ferments to create wild yeast and beneficial bacteria. Unlike store-bought yeast, which is isolated and fast-acting, a starter is alive, evolving, and full of flavor. It’s the ancient way to make bread rise—no packets, no shortcuts.
But here’s the kicker: it’s both incredibly simple and endlessly misunderstood.
The Science Behind Starters (Without the Nerd Talk)
Here’s the non-intimidating version:
Flour + water = fermentation.
Naturally occurring wild yeast and bacteria (lactobacillus) from the air and flour begin to multiply.
The yeast eats the sugars in the flour, producing carbon dioxide—that’s what makes your bread rise.
The bacteria produce acids that add the signature sour flavor.
In short: you’re building a tiny ecosystem in a jar. With regular feedings, this ecosystem becomes strong enough to make your dough rise without any commercial yeast.
Why Use a Starter Instead of Yeast?
Because flavor. And texture. And character.
Store-bought yeast is convenient, but it’s one-dimensional. A sourdough starter creates complex, deep flavors and a chew that’s impossible to replicate. It also:
Helps dough stay fresh longer
Improves digestibility
Creates better crust and structure
Plus, once your starter is active, you never have to buy yeast again. Ever.
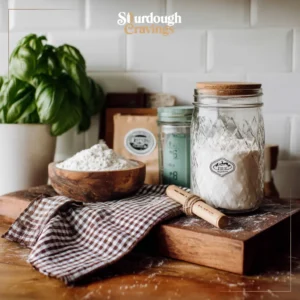
What You’ll Need to Get Started
Don’t overthink this. To create a starter, you only need:
Flour (unbleached all-purpose, whole wheat, or rye)
Water (filtered or tap that’s not heavily chlorinated)
A clean glass jar (16 oz or larger)
A spoon or chopstick for stirring
A scale (recommended, but you can wing it with measuring cups)
That’s it. No pineapple juice, no commercial yeast, no special tools.
Optional but helpful:
Rubber band or tape (to mark growth level)
Digital scale (for consistent feeding ratios)
Loose lid or cloth cover (you want airflow, not an airtight seal)
Common Myths Debunked
Myth #1: You need special flour to start. Truth: Any unbleached flour works. Rye or whole wheat can speed things up, but they’re not required.
Myth #2: You have to feed it every 12 hours or it dies. Truth: Consistency matters, but starters are resilient. They can bounce back from neglect with a few good feedings.
Myth #3: If it smells bad, it’s ruined. Truth: Smells change a lot during the first week. Sour, tangy, even slightly funky odors are often totally normal.
Myth #4: Mold = game over. Truth: Mold is rare if you’re keeping things clean. But if you see pink, orange, or fuzzy stuff—yes, toss it.
How to Make a Sourdough Starter From Scratch
Creating a sourdough starter is often made to sound like a mystical, high-maintenance ritual. It’s not. If you can stir flour and water together, you can build a thriving starter.
The key is patience, observation, and a little faith in nature.
Day-by-Day Starter Creation Timeline (Days 1–7)
Here’s a simple, proven process I’ve used—and taught to hundreds of home bakers.
Day 1: Mix
Combine 60g (½ cup) flour + 60g (¼ cup) lukewarm water in a clean jar.
Stir until no dry flour remains.
Loosely cover. Let sit at room temp (70–75°F is ideal).
Day 2: Check (but don’t feed)
You might see a few bubbles. You might see nothing. Don’t feed it. Just give it a stir and let it rest.
Day 3: First Feed
Discard half of the mixture.
Add 60g flour + 60g water. Stir and cover.
Mark the level with tape or rubber band.
Day 4: More Activity
By now, you should see bubbles and smell something tangy or fruity.
Repeat the feeding. If it’s sluggish, don’t panic. It’s normal for things to stall here.
Day 5: Rising and Falling
If it’s rising and falling predictably within 6–8 hours after feeding, you’re getting close.
Keep feeding every 24 hours.
Day 6: Double Trouble
A mature starter will double in size within 4–6 hours of feeding.
Texture should be airy and sponge-like. Smell should be clean and sour.
Day 7: Ready to Use
Test it: If it doubles reliably, smells pleasant, and passes the float test (more on that later), you’re ready to bake.
If you’re unsure whether it’s really active, check out our guide on the Sourdough Starter Float Test. (Coming soon)
Visual Signs of Progress (Or Problems)
What you want to see:
Bubbles: Small at first, bigger and more frequent over time
Rising: It should double in volume when active
Smell: Tangy, sour, or slightly fruity is good
What might go wrong:
No activity at all: Your kitchen might be too cold or your flour too refined
Stinky or rotten smell: Could mean contamination—scrape off top layer and continue feeding, or start fresh if it’s foul
Pink/orange spots: That’s mold. Toss it.
If your starter seems slow to rise, you may find our Sourdough Starter Rising Time Guide helpful. (Coming soon)
What Flour to Use (Rye vs. White vs. Whole Wheat)
Each flour feeds the microbes a little differently. Here’s a quick breakdown:
Flour Type
Pros
Cons
Whole Wheat
High in nutrients, kickstarts growth
Can get sticky and dense
Rye
Ferments quickly, very active
More expensive, strong smell
All-Purpose
Easy to find, mild flavor
Slower fermentation, fewer nutrients
My favorite approach? Start with a 50/50 mix of rye and all-purpose. Once the starter is active, switch to whatever flour you plan to bake with most.
To better understand how flour choice affects your starter’s growth, see the Best Flour for Sourdough Starter guide. (Coming soon)
Water, Temperature, and Timing Tips
Water: Use filtered water if your tap water is heavily chlorinated. Room temp water works best.
Temperature: Starters like warmth. Ideal is 70–78°F. If your house is cold, keep the jar in the oven (turned off) with the light on.
Timing: Feed at the same time daily. Think of it like a pet—your starter loves routine.
Feeding Your Sourdough Starter (And Keeping It Alive)
Once your sourdough starter is active, bubbly, and rising predictably, your job shifts from creating to maintaining. That means feeding it on a regular schedule—and learning to read its hunger cues.
The good news? A healthy sourdough starter is easier to care for than a houseplant. Let’s break down how to keep your sourdough starter thriving.
Feeding Ratios Explained (With a Simple Formula)
Feeding your sourdough starter means discarding part of it, then replenishing it with fresh flour and water.
The most common feeding ratio for a sourdough starter is 1:1:1, meaning:
1 part sourdough starter
1 part flour
1 part water (by weight)
For example:
50g sourdough starter
50g flour
50g water
This keeps your sourdough starter balanced and prevents your jar from overflowing. For a smaller amount, a 25g/25g/25g feeding works just as well.
If you want your sourdough starter to grow faster, you can feed it at a 1:2:2 or 1:3:3 ratio.
But honestly? You don’t need to obsess. Pick a consistent ratio that works for your sourdough starter and your baking habits, and stick with it.
Tip: Always stir your sourdough starter thoroughly. You’re trying to introduce oxygen and evenly hydrate the flour.
If you’re looking to fine-tune the balance based on your baking schedule or climate, check out the Sourdough Starter Feeding Ratio Secrets guide. (Coming soon)
Here’s a simple calculator you can use right now:
Feeding Schedules: Daily vs. Weekly
There are two ways to keep your sourdough starter going strong:
1. Room Temperature Method (Daily Feeding)
Feed your sourdough starter every 24 hours
Ideal if you bake 3–4 times a week
Keeps your sourdough starter at peak strength
2. Refrigerator Method (Weekly or Biweekly Feeding)
Feed your sourdough starter, let it rest at room temp for 1–2 hours, then refrigerate
Feed your refrigerated sourdough starter once a week
Perfect for casual bakers or “weekend bread warriors”
Just remember: always let your sourdough starter come to room temp before feeding or baking. Cold sourdough starter is sluggish and less predictable.
Learn more about timing and maintenance routines in our How Often to Feed Sourdough Starter guide. (Coming soon)
There’s no one-size-fits-all solution. If you bake often, the countertop is your friend. If you bake once a week, the fridge keeps things low maintenance.
I recommend starting with your sourdough starter on the counter for the first 1–2 weeks, then moving it to the fridge once stable.
When you’re ready to choose the best option for your routine, check out our detailed breakdown in How to Store Your Sourdough Starter. (Coming soon)
Signs Your Sourdough Starter Is Hungry or Overfed
Your sourdough starter is hungry if:
It has deflated and smells sharp or acidic
It has hooch (a watery layer on top)
It rises slowly or not at all after feeding
Your sourdough starter is overfed if:
You’re feeding a massive jar every day and discarding too much
It smells like raw flour, with no tang
You’re diluting the activity too often, which weakens fermentation
Balance is key. If your sourdough starter looks and smells lively, you’re doing great. Don’t fix what isn’t broken.
Troubleshooting Common Sourdough Starter Problems
Even if you’re following all the rules, your sourdough starter might throw you a curveball. It might stall. Smell weird. Stop rising. Or grow something sketchy on top. Don’t panic. Most starter problems are fixable—and very common.
This section will walk you through what’s normal, what’s not, and how to fix it.
Why Isn’t My Sourdough Starter Bubbling?
Lack of bubbles is one of the top concerns for beginners. Here’s why it might be happening:
It’s too cold: Starters love warmth (ideally 70–78°F). If your kitchen is chilly, fermentation slows.
Flour is too refined: Bleached white flour has fewer wild yeasts. Try switching to whole wheat or rye temporarily.
Water has chlorine: Highly chlorinated water can slow or kill fermentation. Use filtered or let tap water sit out overnight.
Starter is too young: In the first 2–3 days, bubbling can come and go. Be patient and keep feeding.
If you’re not seeing any change by Day 5, your environment or flour may need tweaking.
Lack of bubbles is one of the most common frustrations—especially for new bakers. Temperature, flour type, water quality, or even timing can all play a role.
If you’re still unsure after a few days of slow activity, you might find our guide on why your sourdough starter isn’t bubbling helpful. (Coming soon)
What’s That Smell?
Sourdough starters have a dynamic aroma profile—especially in the first week. Here’s a quick guide:
Smell
Normal?
What It Means
Vinegar / Tangy
Yes
Healthy acidity is building
Fruity or yeasty
Yes
Great sign, fermentation is active
Nail polish / alcohol
Sort of
It’s hungry; discard and feed it
Rotten / putrid
No
Toss and start fresh
Starters often smell like alcohol when they’ve been neglected. That’s called hooch, and it’s usually harmless. Just pour it off and give your starter a good feeding.
Still not sure if what you’re smelling is okay? We’ll cover that in our guide on why your sourdough starter smells like alcohol. (Coming soon)
Surface liquid (hooch): Totally normal after neglect. It looks grayish or brown and can be stirred in or poured off.
Color changes: Slight color variation is normal. But pink, orange, or red? That’s mold—time to toss it.
Fuzz or spots: If it’s fuzzy or has green/black mold, don’t scrape it off. Start over with fresh flour and water.
Not every weird thing on your starter is mold. Hooch (a grayish liquid) is normal and harmless. But red, orange, or fuzzy patches are not.
If you’re dealing with discoloration or growth, our visual guide on how to fix a sourdough starter with mold will help you know when to save it and when to start over. (Coming soon)
Starter Health Quiz
Storing, Freezing, and Reviving a Sourdough Starter
Once your sourdough starter is active and healthy, you don’t need to keep it on the counter forever. Whether you’re taking a baking break, going on vacation, or just want to reduce daily maintenance, storage is simple—and flexible.
In this section, you’ll learn how to refrigerate, freeze, dry, and revive your sourdough starter without losing its strength.
How Long Can a Sourdough Starter Sit in the Fridge?
Most sourdough starters can survive in the fridge for 7 to 14 days without feeding.
If you’re only baking once a week, refrigerating your starter is ideal. Just follow this basic process:
Feed your starter
Let it sit at room temp for 1–2 hours
Cover loosely and place it in the fridge
Before your next bake, take it out, let it come to room temperature, and give it 1–2 feedings to reactivate.
Need a full breakdown on storage safety, feeding frequency, and risks of forgetting it too long? Coming Soon: [How to Store Sourdough Starter]
Reviving a Neglected Starter
If your sourdough starter has been in the fridge for a few weeks—or even a couple of months—you can often bring it back to life.
Here’s how:
Remove any hooch or dark liquid from the top
Discard most of the starter (save ~1 tablespoon)
Feed at 1:1:1 (or even 1:2:2 if it’s sluggish)
Keep it warm and feed it every 12 hours for 2–3 cycles
Don’t be discouraged if it takes a few days. Old starters can bounce back with a little care.
Want a full guide on this process? Coming Soon: [How to Revive a Dormant Starter]
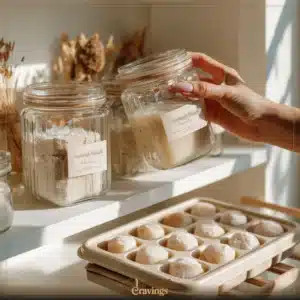
Freezing vs. Drying Your Starter for Long-Term Storage
If you’re stepping away for more than a few weeks, freezing or drying your sourdough starter is the best way to preserve it.
Freezing Instructions:
Feed your starter
Let it peak
Portion into small containers or ice cube trays
Freeze and label with the date
Drying Instructions:
Spread a thin layer of active starter on parchment paper
Let it dry completely
Break into flakes and store in an airtight jar
This method is great for gifting, backups, or emergencies.
For a full tutorial with images and restoration steps: Coming Soon: [How to Dry & Freeze Sourdough Starter]
Starter Storage While Traveling
If you’re going away for a short trip (under 2 weeks), the fridge method works fine.
For longer vacations or international travel:
Freeze it (short-term)
Dry it (long-term)
Or… give it to a fellow baker to “starter-sit”
For more real-life examples and options: Coming Soon: [Sourdough Starter on Vacation Guide]
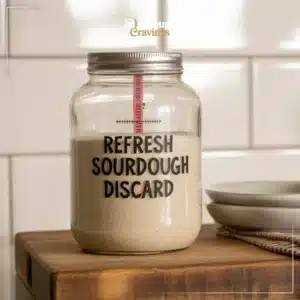
How to Use Sourdough Starter Discard Without Waste
If you’re feeding your sourdough starter regularly, you’re also discarding part of it. That can feel wasteful—especially when flour prices are high or your starter’s doubling like crazy.
But here’s the good news: sourdough starter discard is still alive, flavorful, and perfect for dozens of quick recipes.
In this section, we’ll cover what discard is, how to store it, how long it lasts, and what to make with it—so not a drop goes to waste.
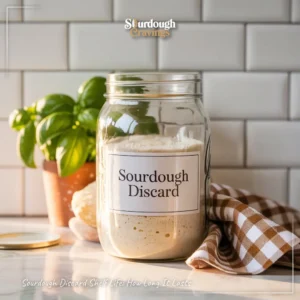
What Is Sourdough Starter Discard?
Discard is the portion of your sourdough starter that you remove before each feeding. You’re not throwing it away because it’s bad—just because you’re maintaining the starter’s balance and size.
It still has flavor, mild acidity, and fermentation power. You can use it in baked goods that don’t need rising (like pancakes, muffins, or crackers), or add a depth of flavor to recipes that do.
If you want to dig deeper into the why behind discard and how to plan for it, check out our dedicated guide: Coming Soon: [How to Use Sourdough Starter Discard]
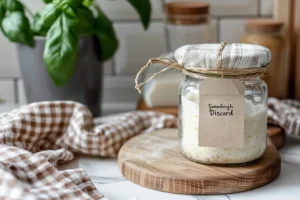
When and How to Save Discard
Here’s how I do it:
Use a separate jar for storing discard (label it clearly)
Store it in the fridge right after each feeding
Use it within 7 days for best results
Stir well before using—liquid separation is normal
If you’re not using your discard immediately, keep the container sealed and cold. Discard that’s been sitting out for hours may develop strong smells or undesirable bacteria.
For full instructions on how to manage and store discard safely: Coming Soon: [Sourdough Starter Maintenance Routine]
Favorite Discard Recipes
Some of my favorite things to make with discard include:
Sourdough pancakes or waffles
Discard crackers (super crispy!)
Chocolate cake with discard for a tangy depth
Discard biscuits, muffins, or banana bread
Sourdough discard brownies (trust me)
You’ll find dozens of creative recipes linked in our sourdough discard resource page: Coming Soon: [How to Use Sourdough Starter Discard]
For now, try the recipe finder tool below to get an idea based on what ingredients you have on hand.
Sourdough Discard Recipe Finder Tool
Starter Care Routines That Actually Work
Your sourdough starter doesn’t need to be babied—but it does need a routine. Just like brushing your teeth or feeding a pet, consistent care will keep your starter strong, stable, and ready for action.
This section covers simple weekly habits, printable checklists, time-saving shortcuts, and how to scale your starter when you’re ready to bake bigger.
Weekly Maintenance Checklist
To keep your starter healthy (especially if it lives in the fridge), do this once a week:
Remove it from the fridge
Discard all but 25–50g
Feed with equal parts flour and water by weight
Let it sit at room temperature for 2–4 hours
Return it to the fridge loosely covered
If you’re keeping it on the counter, feed every 24 hours using the same method.
We’ll show you how to create your own printable tracker in that guide.
“Lazy Day” Shortcuts for Busy Weeks
Even if life gets hectic, you don’t have to give up on your starter. Here are shortcuts that work:
Use the fridge more often. Starters survive 1–2 weeks without feeding.
If you forget a feeding: don’t panic. Scrape, feed, and give it time.
Use less flour in off weeks (e.g., feed only 15g flour + 15g water)
You’ll find more time-saving ideas in the upcoming routine article mentioned above.
Scaling Up for Bigger Bakes
When you’re ready to bake multiple loaves or large recipes, you’ll need more starter. Here’s how to scale up:
Feed at 1:2:2 or 1:3:3 ratio to bulk it up
Do this 1–2 days before baking
Keep extra in a separate jar and return unused starter to the fridge
We’ll walk through exact timelines and ratios in the guide on Scaling Up Your Sourdough Starter. (Coming soon)
Real-Life Starter Examples (Wins and Fails)
Sourdough isn’t just science—it’s a bit of a relationship. You feed it, observe it, forgive its weird smells, and celebrate its growth. In this section, I’ll share real-life starter stories (mine and others’) that prove every baker runs into bumps—and breakthroughs.
Claire’s “Almost Dead” Starter Story
When I first started baking, I forgot to feed my starter for two weeks. It had a layer of dark hooch and smelled like vinegar mixed with gym socks.
I almost tossed it.
But I scraped off the top, saved a tablespoon, and fed it twice a day for three days straight. By Day 4, it was doubling faster than ever.
Moral of the story? Most starters are hardier than you think. What seems dead may just be hungry.
Want to learn how to revive your own neglected starter? Coming Soon: [How to Revive a Dormant Starter]
Success Snapshot: Jason’s Cracked the Rise
Jason (a home baker in Minnesota) used a rye-based starter but struggled with low rise. After switching to a 1:3:3 feeding and moving his jar to the top of his fridge, his starter began doubling in 5 hours.
Now? He’s baking three loaves a week and giving starter jars away to friends.
We’ll go into more detail on rye and hydration effects in our Whole Wheat vs. Rye Starter Benefits breakdown. (Coming soon)
Fail Moment: Sam’s Mold Disaster
Sam messaged me a photo of his starter with pink fuzz and green spots. He had been covering it too tightly and feeding it sporadically.
Sadly, that one had to go. But he started fresh, switched to rye, and now his new starter’s name is “Beasty.”
If you’re worried about contamination or off smells, our guide on How to Fix a Sourdough Starter with Mold will walk you through it. (Coming soon)
When Starters Get Smelly
Alcohol smell? Totally normal—it’s called hooch. Rotten smell? Toss it. One of our readers kept feeding a starter that smelled like blue cheese, hoping it would balance out. It didn’t.
We’ll walk through what’s normal (and what’s not) in the article on Why Your Starter Smells Like Alcohol. (Coming soon)
Choosing the Best Containers and Jars for Your Starter
Your sourdough starter doesn’t care about aesthetics—but you should. The container you use directly affects how easily you can monitor, feed, store, and clean your starter.
Let’s walk through the best options (and what to avoid).
What Makes a Great Starter Container?
A solid sourdough container should be:
Transparent (so you can see rise bubbles and track volume)
Non-reactive (glass, food-safe plastic, or ceramic)
Tall and narrow (for accurate rise monitoring)
Easy to clean (no hard-to-reach edges)
Avoid metal containers—especially aluminum—as acidity in the starter can react with metal.
If you’re deep in setup mode, don’t miss our deep dive on the Best Jars & Containers for Starter. (Coming soon)
Glass vs. Plastic vs. Ceramic: A Quick Comparison
Container Type
Pros
Cons
Glass Jar (Mason or Weck)
Transparent, doesn’t stain, easy to clean
Breakable, heavier
Plastic Container (Food Grade)
Lightweight, portable, less risk of breakage
Scratches/stains over time, may retain odors
Ceramic Crock
Looks great, excellent for long-term fridge storage
Opaque (hard to see bubbles), heavier, harder to clean
Most home bakers start with a wide-mouth glass jar—easy to clean and lets you spot mold or hooch before it becomes a problem.
Ideal Jar Size
Choose a container that gives your starter room to double or triple in height.
Minimum size: 16 oz (for casual bakers)
Preferred: 24–32 oz (more room for overflow protection)
Pro-level: 1-liter or quart jars with snap lids or breathable cloth covers
Pro tip: Use a rubber band or masking tape on the outside of the jar to mark the starter’s height after feeding. That way, you’ll know exactly when it has doubled.
External Product Picks
These are starter-safe containers many home bakers (including me) use and love:
Sourdough Starter Hydration Explained: Liquid vs. Stiff
Hydration is one of those sourdough terms that sounds more technical than it is. It simply refers to the ratio of water to flour in your starter. Adjusting it can change how your starter behaves—its texture, rise, and even flavor.
Let’s break down the difference between a liquid and stiff sourdough starter, and when to use each one.
What Is Starter Hydration?
Hydration = (Water ÷ Flour) × 100
Most sourdough starters are kept at 100% hydration, meaning equal parts water and flour by weight. For example:
50g flour
50g water = 100% hydration
If you reduce the water, you’ll get a stiff starter. If you increase it, you’ll get a more liquid one.
For more detail, refer to our full guide on the Liquid vs. Stiff Sourdough Starter debate. (Coming soon)
Feature
Liquid Starter (100%+)
Stiff Starter (50–65%)
Texture
Pourable, batter-like
Doughy, kneadable
Rise Speed
Faster fermentation
Slower but steady
Feeding Frequency
Needs more frequent feeding
More forgiving between feeds
Flavor Profile
Tangier, more acidic
Milder, more controlled sour
Best For
Artisan loaves, pancakes
Italian breads (like panettone), controlled proofing
Storage Preference
Short-term countertop
Long-term fridge or travel
Liquid vs. Stiff: Comparison Chart
Most beginners should start with a liquid starter. It’s easier to stir, easier to read, and more responsive. But once you’re confident, experimenting with a stiff starter can give you longer fermentation windows and different flavor profiles.
When Should You Use a Stiff Starter?
Switch to stiff hydration if:
You’re storing your starter for more than a week
You want more time between feedings
You’re baking with enriched doughs (like brioche or panettone)
You need a more mild, less tangy flavor
Looking for instructions on changing hydration safely? We cover that step-by-step in the Liquid vs. Stiff Sourdough Starter guide. (Coming soon)
Whole Wheat vs. Rye: What’s the Best Flour for Your Starter?
Flour isn’t just food for your sourdough starter—it’s fuel, personality, and even attitude. The type of flour you use impacts how fast your starter grows, how it smells, and how it flavors your bread.
So which is better: whole wheat or rye? The answer depends on your goals.
The Real Difference Between Flours
Here’s how these two powerhouse flours stack up when it comes to sourdough starter performance:
Feature
Whole Wheat Flour
Rye Flour
Fermentation Speed
Moderate
Very fast
Flavor Impact
Mild, earthy
Strong, tangy, spicy
Wild Yeast Content
High
Extremely high
Gluten Strength
Moderate
Weak (requires blending)
Ideal Use
Balanced rise + flavor
Rapid startup or boosting sluggish starter
Texture Result
Slightly dense, hearty crumb
Lighter texture with deep flavor
Want a more detailed guide on flour pros, cons, and pairing strategies? Coming Soon: [Whole Wheat vs. Rye Starter Benefits]
When to Use Whole Wheat
Whole wheat flour contains more bran, germ, and natural wild yeast than white flour. It feeds your starter well but ferments slower than rye. Choose it when you want:
A strong but mellow starter
Consistent behavior for everyday baking
A slightly nutty, complex flavor
Whole wheat is a great “middle ground” between white and rye—it’s easier to manage than rye and more active than all-purpose.
When to Use Rye
Rye flour is a wild yeast magnet. It causes explosive fermentation, especially in the early days of building a starter. Choose rye if:
You’re starting a brand-new culture
Your starter has stalled or seems inactive
You want bold, tangy, rich flavors
Rye can make the starter looser and less elastic, so many bakers mix it 50/50 with white or whole wheat to strike a balance.
We explore ideal blend ratios and feeding schedules in the Best Flour for Sourdough Starter guide. (Coming soon)
The Bottom Line
Start with rye to jumpstart your culture. Switch to whole wheat (or a mix) for stability. Then transition to your preferred baking flour once your starter is reliable.
How to Build a Levain from Your Starter
So your sourdough starter is active and healthy. You’re ready to bake—but should you use your starter directly? Or build a levain?
In most professional-style sourdough baking, you don’t use the mother starter directly. You build a levain: a specific offshoot of your starter, prepared with a targeted ratio and timeline to match your recipe.
Let’s walk through how (and why) to do it.
What Is a Levain?
A levain is a mixture of starter, flour, and water built separately from your main starter just for one bake. Think of it as your “production starter”—fully customized for timing, flavor, and dough hydration.
Here’s how it works:
You take a small amount of your active starter (e.g. 20g)
Feed it with specific amounts of flour and water (e.g. 80g each)
Let it ferment until it’s bubbly and ready to bake (usually 4–12 hours)
Use the levain in your dough and keep your original starter intact
Need more help building one? Coming Soon: [How to Build a Levain from Starter]
Why Not Just Use the Starter Directly?
You can—but using a levain gives you more control. With a levain, you can:
Adjust hydration more precisely (stiff or liquid depending on your dough)
Keep your main starter small and low-maintenance
Match fermentation time to your baking schedule
Avoid depleting your main starter accidentally
This approach is especially helpful when baking large batches or recipes with unique timelines.
Levain Building Timeline Example
Let’s say your recipe calls for 160g levain at 100% hydration. Here’s how to build it:
Time
Step
8:00 AM
Mix 20g starter + 80g flour + 80g water
8:00–12:00
Let sit at room temp (70–78°F)
12:00 PM
Levain should be doubled and bubbly
12:15 PM
Use levain in dough
You can tweak the feeding ratio or temperature to speed up or slow down fermentation. Need help planning this with precision? We’ll walk through timing adjustments in the upcoming levain guide above.
Pro Tips for Building Levain
Use your starter at its peak to build the strongest levain
Always mix with clean, room-temp water
Mark the container to track rise visually
If using in high-hydration doughs, stiffen the levain to help structure
Want to learn how to calculate flour and water contributions from levain into the dough recipe? That will be fully explained in: Coming Soon: [How to Build a Levain from Starter]
Sourdough Starter Feeding Schedule Template
Let’s face it—feeding your sourdough starter can feel like babysitting, especially when you’re just starting out. But once you understand your starter’s rhythm and the feeding options, it becomes as routine as your morning coffee.
In this section, I’ll give you a ready-to-use schedule, explain daily vs. weekly feeding strategies, and show you how to adjust your routine based on temperature, flour, and your baking goals.
Why a Feeding Schedule Matters
Whether you keep your starter on the counter or in the fridge, consistency helps your wild yeast stay active and predictable.
Too frequent? You waste flour. Too infrequent? You risk hooch, acidity, or dormancy.
For deeper strategy, check out our full breakdown in: Coming Soon: [How Often to Feed Sourdough Starter]
3 Popular Feeding Schedules
Here’s a comparison of three common routines:
Feeding Plan
Location
Frequency
Notes
Daily Feedings
Room Temp
Every 24 hours
Best for frequent bakers
Twice Daily
Room Temp
Every 12 hours
Ideal for building strength before baking
Weekly (Cold)
Refrigerator
Every 5–7 days
Best for maintenance and low-use bakers
If your kitchen is very warm (above 78°F), you may need to feed more often. If it’s cool, once per day may be plenty—even at room temp.
Starter Feeding Template: Room Temperature
Day
Time
Action
Mon
8 AM
Feed 1:1:1 (50g starter, 50g water, 50g flour)
Tue
8 AM
Repeat feed
Wed
8 AM
Feed or refrigerate if not baking
Thu
8 AM
(Optional) Feed
Fri
8 AM
Feed and prep for bake
Sat
9 AM
Build levain or bake
Sun
Rest
Starter in fridge or feed lightly
You can scale the weights to suit your needs, but always feed equal parts water and flour by weight for 100% hydration.
Tips for Managing Your Schedule
Use a Reminder App or calendar to get into rhythm
Mark Your Jar with tape to track rise
Log Feeding Notes (use our downloadable tracker or journal)
If starter is too sour or sluggish, increase feeding frequency
Sourdough Starter Float Test Explained
You’ve probably seen it all over sourdough forums: “Do the float test to see if your starter is ready!” But what does that actually mean—and can you trust it?
In this section, I’ll show you how to do the float test properly, what it reveals about your starter, and when it might lead you astray.
What Is the Float Test?
The float test is a simple method to check if your sourdough starter is mature and aerated enough to bake with.
How to perform it:
Fill a glass or bowl with room temperature water.
Scoop a teaspoon of your starter from the top (not stirred).
Gently drop it into the water.
If it floats, it’s likely ready to bake.
If it sinks, it may be underfed, overproofed, or inactive.
We go deeper into the variables and troubleshooting in: Coming Soon: [Sourdough Starter Float Test Explained]
Why It Works (Usually)
The test relies on the fact that active yeast and trapped gas create buoyancy. When your starter is strong and recently fed, the CO₂ buildup causes it to float.
It’s a fast visual check for:
Active fermentation
Sufficient rise
Good structure
When the Float Test Fails
Despite its popularity, the float test isn’t foolproof. Here’s when it can give false results:
Too runny: High hydration starters might sink even when active.
Stirred sample: If you stir your starter before testing, you’ll knock out the bubbles.
Overproofed: If your starter rose and collapsed, it may no longer float—even though it was ready hours earlier.
Stiff starters: May not float well even when fully mature.
That’s why the float test should be one of many readiness indicators—not your only one.
Better Signs Your Starter Is Ready
Float test or not, your starter is probably ready to use if:
It has doubled (or tripled) in volume
It’s full of visible bubbles
It smells yeasty and slightly tangy (not sharp or vinegary)
A spoonful feels light and airy
Want to master starter readiness beyond the float test? We’ll break it all down visually in the article: Coming Soon: [Sourdough Starter Float Test Explained]
How to Tell If Your Starter Is Ready to Bake
This is one of the most common questions I get from beginner bakers: “How do I know my sourdough starter is actually ready to use in a recipe?”
Good question. Because jumping the gun—or waiting too long—can mean flat loaves, gummy centers, or inconsistent rise.
Let’s walk through the real signals your starter is ready to bake.
1. It Has Doubled (or Tripled) in Volume
A strong starter will double or triple in size within 4–8 hours after feeding at room temperature.
How to check it:
Use a rubber band or marker on the jar when you feed it
Set a timer
Watch for maximum rise
If it’s barely risen after 8–12 hours, it may not be ready. Try warming it up or feeding with fresh flour to activate.
2. It’s Full of Bubbles
Look for small and medium bubbles on the sides, top, and bottom of your container. A flat or dense starter with no visible air pockets isn’t ready yet.
Also, give it a stir—if it feels light, stretchy, and airy, you’re close.
3. It Smells Like It Wants to Bake
A ready starter should smell:
Yeasty (like bread dough)
Slightly tangy (like yogurt)
Clean and bright
If it smells like alcohol or vinegar, it may have overfermented. Don’t panic—you can refresh it with a couple of feedings.
Want help identifying the smells and what they mean? Coming Soon: [Why Your Starter Smells Like Alcohol]
4. It Passes the Rise Timing Test
Here’s a general starter timeline for room temperature at 70–75°F:
Time After Feeding
What to Expect
0 hrs
Starter just fed, dense and flat
2–3 hrs
Slight expansion begins
4–6 hrs
Rapid rise, lots of bubbles
6–8 hrs
Peak activity (best time to bake)
8–10+ hrs
May begin to collapse, hooch may form
This is a basic guide—you’ll refine your timing as your starter matures and your kitchen temperature fluctuates.
More guidance and printable timelines coming in: Coming Soon: [Sourdough Starter Rising Time Guide]
5. It’s at Its Peak
You want to catch your starter at peak rise—not before and definitely not after it collapses.
If you’re not baking right away:
Store the starter in the fridge at peak
Or build a levain for baking later
Bonus Tip: Log Your Bakes
Keep a notebook or spreadsheet with:
Feeding time
Peak time
Rise height
Bake results
This will help you recognize your starter’s behavior and dial in your perfect baking window.
Dealing with Alcohol Smell and Acidity in Starter
Sometimes you lift the lid on your sourdough starter and get hit with a sharp, boozy smell. Other times it might smell like nail polish remover, vinegar, or straight-up funk. These odors usually signal that your starter is struggling with excess acidity or hasn’t been fed in a while.
The good news? It’s fixable—and actually pretty common, especially for starters stored in the fridge.
Let’s break down what’s happening and how to bring it back to balance.
What Causes Alcohol Smells?
When a starter is hungry—meaning it’s gone too long without food—yeast and bacteria begin to break down leftover starches. This produces a byproduct called hooch, which floats on top and smells like alcohol.
This can happen when:
You skip regular feedings
Your kitchen is very warm
The starter has been refrigerated too long
Hooch is a sign that the microbes are still alive, just starving.
Want a deeper explanation of what’s behind these sourdough smells? Coming Soon: [Why Your Starter Smells Like Alcohol]
What to Do If It Smells Too Strong
Here’s how to fix an overly sour or alcoholic starter:
Stir in the hooch or pour it off (either is fine)
Feed it 1:2:2 or 1:3:3 (starter:flour:water) to dilute the acid
Repeat for 2–3 feedings at 12-hour intervals
This process “resets” the acidity and brings the microbes back into balance.
If the starter still smells bad after that, it may need more time—or fresher flour. Rye or whole wheat can boost activity and speed recovery.
More tips and feeding ratios will be covered in: Coming Soon: [How to Reduce Acidity in Starter]
Avoiding Acidity in the Future
To keep your starter balanced long-term:
Feed regularly (especially at warm temps)
Don’t use a tiny feeding ratio (1:1:1 or smaller can lead to acidity buildup)
Keep it cool if not baking (store in fridge after peak rise)
If your starter is only used once a week or less, feed it, let it peak, and refrigerate it right away. This prevents overfermentation and hooch buildup.
Does It Mean Your Starter Is Dead?
Not at all. A strong alcohol or acetone smell doesn’t mean your starter is ruined—it just needs food and consistency. As long as there’s no mold or discoloration, it can bounce back quickly.
If you’re unsure whether to continue reviving or start fresh, stay tuned for: Coming Soon: [How Long Before Starter Expires?]
Scaling Up Your Starter for Big Bakes
If you’re planning to bake multiple loaves, make sourdough pizza for a crowd, or run a microbakery, your tiny daily starter just won’t cut it. You need to scale up—but you want to do it without losing consistency or throwing off your dough ratios.
Here’s how to safely bulk up your sourdough starter for large baking days.
When Should You Scale?
You should scale your starter when:
Your recipe calls for more than 150g of starter
You need enough to build a large levain
You’re baking more than one loaf at a time
For example, a recipe with 3 loaves might need:
75g starter per loaf
Total: 225g starter
Plus some buffer = 275g total
Instead of feeding your 30g base starter five times, you can scale it once with the correct ratio.
For detailed instructions and alternate approaches, see: Coming Soon: [Scaling Up Your Sourdough Starter]
Bulk Feeding Example
Let’s say your recipe calls for 300g starter. You can build that in one feed:
50g starter
125g water
125g flour = 300g total at 100% hydration
Want to keep some for your next bake? Just reserve 25–50g from that mix before using it all. Feed it again and store as usual.
How to Keep It Active at Scale
The larger the starter, the more heat and fermentation it generates. Here’s how to manage that:
Use a wide container to increase surface area
Stir occasionally to release trapped CO₂
Feed with colder water if your kitchen runs hot
Use higher hydration (like 110–120%) for faster builds
Once it peaks, use it or refrigerate immediately—don’t let it sit and collapse.
Don’t Forget the Ratio Math
Stick to weight-based ratios like 1:2:2 or 1:3:3 when scaling. If you’re unsure how much to build, reverse-engineer it from your dough:
Example:
Your dough needs 200g of levain
You’re building it at 1:2:2 → starter + flour + water
200 ÷ 5 = 40g starter
Feed 40g starter + 80g flour + 80g water
This keeps your hydration and flavor predictable across multiple loaves.
We’ll provide pre-bake ratio charts in the full article: Coming Soon: [Scaling Up Your Sourdough Starter]
Sourdough Starter on Vacation (Or When Life Gets Busy)
So you’re heading out of town. Or maybe life’s just hectic and you need a break from baking. Good news: your sourdough starter doesn’t need daily attention forever. With the right steps, you can pause your sourdough starter without killing it—and without starting over when you return.
Here’s exactly how to keep your sourdough starter healthy while you’re away (or taking a baking break).
Option 1: Refrigerate Your Sourdough Starter
For breaks under 2–3 weeks, the refrigerator is your best friend.
Steps:
Feed your sourdough starter like normal (1:2:2 or 1:3:3)
Let it sit at room temperature until it just starts to rise
Cover loosely and place it in the fridge
That’s it.
Your sourdough starter will go dormant but stay alive. It may develop hooch (the liquid layer) over time—just stir or pour it off and feed when you return.
Get full instructions for this method in: Coming Soon: [Sourdough Starter on Vacation Guide]
Option 2: Dry Your Sourdough Starter for Long Breaks
Leaving for a month or more? Dry your sourdough starter to store it indefinitely.
How to dry it:
Spread a thin layer of active sourdough starter on parchment
Let it air dry for 24–48 hours (until brittle)
Break it into flakes and store in an airtight jar or zip bag
Label with date and flour used
To reactivate: rehydrate with equal parts water and flour, and feed over a few days until bubbly again.
This method is great for emergency backups too.
Option 3: Give Your Sourdough Starter to a Friend
If you’ve got sourdough-loving friends (or want to convert some), leave your starter in their care.
Leave instructions:
How often to feed (usually once a week)
Flour and water ratios
What it should look/smell like when active
And of course, promise them some fresh bread when you return.
How to Restart After a Break
Whether you dried it or refrigerated it, you’ll need to warm it back up.
Steps:
Let the sourdough starter come to room temp
Feed it at least twice (every 12 hours)
Wait for it to double in size and smell fresh
If it’s sluggish, try a few consecutive feedings with whole wheat or rye to bring it back to life.
Wondering how long a break is too long? That’s coming in: Coming Soon: [How Long Before Starter Expires?]
How Long Before Your Sourdough Starter Expires (or Needs Replacing)?
One of the biggest misconceptions about sourdough starter is that it has a strict expiration date. Truth is, a sourdough starter can last forever if properly cared for. Some bakeries use starters that are over 100 years old! But that doesn’t mean your sourdough starter is immortal no matter what.
Let’s look at how to know when your sourdough starter is still revivable—and when it might be time to start fresh.
Can a Sourdough Starter Die?
Yes, but it’s rare.
Your sourdough starter is a living colony of wild yeast and beneficial bacteria. If it’s fed regularly and stored correctly, it will thrive for years. Even neglected sourdough starter with hooch, strong odors, or discoloration can often bounce back.
What usually kills a sourdough starter:
Mold (pink, green, black fuzz)
Cross-contamination (raw meat, dirty utensils)
Extreme heat (e.g., left in a hot car)
Long-term dehydration without revival
If your sourdough starter shows visible mold, it’s safest to discard and start over.
We’ll break this down further in: Coming Soon: [How Long Before Starter Expires?]
Signs Your Starter Can Be Saved
If your sourdough starter:
Smells sour but not rotten
Has hooch (but no mold)
Rises slowly (but still rises)
Looks dark or discolored but has no fuzz
…then it can probably be revived.
Steps to revive:
Discard all but a tablespoon of sourdough starter
Feed 1:2:2 (starter:flour:water)
Use whole wheat or rye for 1–3 feedings
Feed twice daily until bubbling and rising predictably
When It’s Time to Start Fresh
Sometimes it’s better to start a new sourdough starter if:
The smell is unbearable or chemically (like paint thinner)
Mold is visible (especially pink or green)
It hasn’t responded to multiple feedings
You’re unsure how long it’s been dormant or contaminated
And that’s totally okay. You’ve learned from your first starter—and you’ll build your next one faster and stronger.
Don’t wait for disaster. Always keep a small backup of your sourdough starter:
Dry a portion and store in an airtight container
Freeze a thick feeding in a zip bag or cube tray
Give a bit to a friend or fellow baker
Then, if something ever happens, you won’t have to start from zero.
1. What is a sourdough starter and how does it work?
A sourdough starter is a live culture of wild yeast and lactic acid bacteria used to naturally leaven bread. It’s made by mixing flour and water and letting it ferment. The natural microbes eat the flour, producing carbon dioxide (to make dough rise) and acids (which create flavor). Jump to full explanation →
2. How long does it take to make a sourdough starter from scratch?
It typically takes 5 to 7 days to build a strong, active sourdough starter. Some may take up to 10 days depending on temperature, flour type, and feeding consistency. Rye or whole wheat flour often speeds up the process. Want more in-depth guidance? Check out our full tutorial: How to Make a Sourdough Starter From Scratch — it covers everything from choosing the right flour to troubleshooting sluggish fermentation, with step-by-step photos and expert tips to help you succeed on your first try.
3. Why is my sourdough starter not bubbling?
If your sourdough starter isn’t bubbling, it may be: Too cold Underfed Using bleached or nutrient-poor flour Exposed to chlorinated water Try warming it up, feeding with whole wheat or rye, and using filtered water. Coming Soon: [Why is My Sourdough Starter Not Bubbling?]
4. How do I know when my sourdough starter is ready?
It’s ready when: It doubles in size within 4–8 hours of feeding Smells mildly tangy and yeasty Passes the float test Has visible bubbles and feels airy when stirred Jump to readiness guide →
5. How often should I feed my sourdough starter?
Room temp: Once or twice daily Fridge: Once a week for maintenance Feeding ratio depends on usage, but 1:2:2 or 1:3:3 are common. Coming Soon: [How Often to Feed Sourdough Starter]
6. What flour is best for sourdough starter?
The best flour is unbleached, whole grain flour with lots of natural microbes. Rye flour is most active. Whole wheat is balanced. All-purpose works too but may need more time to activate. Coming Soon: [Best Flour for Sourdough Starter]
7. Why does my sourdough starter smell like alcohol or vinegar?
That smell comes from hooch, a byproduct of fermentation. It usually means your sourdough starter is hungry and needs to be fed. Stir it in or pour it off, then feed regularly. Coming Soon: [Why Your Starter Smells Like Alcohol]
8. Can I freeze or dry my sourdough starter for later?
Yes! You can: Freeze a thick starter in a zip bag Dry it in flakes for indefinite storage Store it in the fridge for up to a month Coming Soon: [How to Dry & Freeze Sourdough Starter]
9. Is my sourdough starter dead? How can I tell?
It may not be dead—just dormant. Signs of life: Any bubbles after feeding Sour, but not rotten smell No mold present Try feeding 1:2:2 twice a day for 2–3 days. If still inactive, consider restarting. Coming Soon: [How to Revive a Dormant Starter]
10. What can I make with sourdough starter discard?
ons! Discard can be used for: Pancakes and waffles Crackers Pizza dough Biscuits and muffins It’s flavorful and adds a nutritional boost—even when it’s not super active. Coming Soon: [How to Use Sourdough Starter Discard]
Key Takeaways: Sourdough Starter Mastery in a Nutshell
Here’s what we’ve learned:
A sourdough starter is a living culture that can last forever if cared for properly.
The best flour for sourdough starter is often whole wheat or rye to boost activity.
Feeding ratios, hydration, and storage all depend on your baking schedule.
You can revive, scale, pause, and even travel with your sourdough starter.
When it smells weird or flattens, don’t panic—it’s usually fixable.
Your discard is not waste—it’s a versatile baking ingredient.
Mastering the float test, levain builds, and hydration levels lets you bake with precision.
Whether you’re baking daily or once a month, there’s a starter care routine that fits your lifestyle.
Your Next Steps
Now that you’ve mastered the sourdough starter fundamentals, here’s what to do next:
Bookmark this page as your go-to sourdough starter reference.