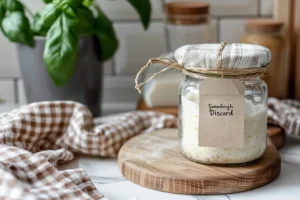
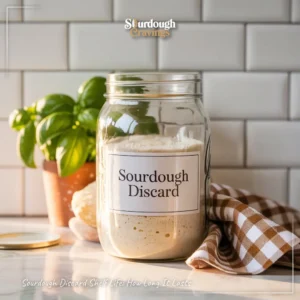
Bringing Tired Sourdough Discard Back to Life
I’ll never forget the day I found a neglected jar of sourdough discard hiding in the back of my fridge. The layer of gray hooch on top, the sour punch when I opened the lid—it looked done for. I almost threw it out. But something in me said, try to refresh it first.

Here’s the good news: even old or sluggish discard can often be revived with just a little attention. In most cases, all it needs is fresh flour, clean water, and the right temperature to spring back to life. Whether your jar has been sitting for a week or you’re dealing with a two-month-old mystery starter, you can refresh sourdough discard safely—and bake again with confidence.
In this guide, I’ll walk you through:
- The science of what happens as discard ages
- How to tell when it’s still usable (and when it’s not)
- The exact steps to refresh sourdough discard back to bubbly health
- Common mistakes to avoid and how to keep your discard fresh for good
If you’ve ever wondered whether your sourdough discard can be rescued, this step-by-step guide will show you the surprisingly simple truth: it’s rarely too late to bring it back.
For a deeper understanding of how discard fits into your sourdough system, start here: Sourdough Discard 101 – The Ultimate No-Waste Guide
Table of Contents
What Happens to Old Sourdough Discard Over Time
If you’ve ever pulled a forgotten jar of sourdough discard from the back of your fridge and found a layer of liquid or a sharp, vinegary smell, don’t worry—it’s not automatically ruined. What’s happening inside that jar is just fermentation continuing at a slower pace. The wild yeast and friendly bacteria haven’t died off; they’ve simply gone dormant after running out of food. That’s exactly why you can often refresh sourdough discard instead of tossing it. It’s resting, not gone.
Recognizing Inactive vs. Spoiled Discard
Old sourdough discard changes over time. Its texture may loosen, bubbles fade, and color darken slightly—but these are normal signs of inactivity.
Here’s how to tell if yours can be saved:
- Inactive discard: Looks dull or slightly gray, maybe separated with a light alcoholic or sour smell — perfectly safe to refresh.
- Spoiled discard: Shows pink, orange, or fuzzy spots — this means contamination, and it’s time to throw it away.
If the smell is tangy or mildly boozy, that’s a good sign; it means your yeast and bacteria are still alive. But if it smells rotten, cheesy, or like ammonia, the balance has broken down and it’s safest to start over.
For a deeper look at what sourdough discard is, and how it behaves over time, visit the Sourdough Discard 101 – The Ultimate No-Waste Guide for Home Bakers. It explains how discard fits into your sourdough system and why aging is a natural part of its life cycle.
Understanding Hooch and Liquid Separation
That thin layer of liquid you see on top of your discard is called hooch, a normal byproduct of fermentation. It appears when the yeast runs out of food and begins to produce alcohol. Depending on how long it’s been sitting, hooch can look clear, gray, or brown.
You can either:
- Stir it back in to keep the acidity (adds tang and depth), or
- Pour it off for a milder flavor and lighter texture.
When you refresh sourdough discard, this liquid layer usually disappears after one or two feedings. It’s simply your starter’s way of saying, “Feed me.”
Why Discard Turns Gray or Smells Strong
As your discard rests, natural acids continue to develop, and pigments in the flour slowly oxidize. This gives the mixture a grayish tint and sharper smell—both completely normal for older discard. Those acids are what make revived discard so flavorful in pancakes, waffles, and crackers.
Once you feed it with fresh flour and water, the mixture lightens in color, smells cleanly sour again, and starts to bubble. That’s your cue that it’s coming back to life.
If your discard looks flat but not fuzzy, smells sour but not spoiled, it’s absolutely worth saving. The next step is learning when to refresh and when to toss it—so you never have to guess again.
When to Refresh vs. When to Toss
Every sourdough baker eventually faces that moment: standing at the counter, spoon in hand, staring at a jar of questionable sourdough discard and wondering—can I still use this? The truth is, not every jar is beyond saving. But knowing when to refresh sourdough discard and when to let it go can make all the difference between a healthy starter and an upset stomach.
1. The Look Test: What Healthy Discard Should (and Shouldn’t) Look Like
Start with a visual check. Fresh or recoverable discard will look smooth and slightly elastic, even if a thin layer of hooch has formed on top. The color may be off-white, beige, or light gray—totally normal for discard that’s been resting in the fridge.
But if you see:
- Pink or orange streaks
- Blue or green fuzzy spots
- A thick, sticky layer that looks slimy
…it’s time to throw it out. These are signs of mold or bacterial contamination, and no amount of feeding will make that safe again.
If you’re unsure whether what you’re seeing is hooch or mold, you can cross-check the detailed visuals in the [Troubleshooting Discard: Mold & Hooch Guide] (Coming Soon).
2. The Smell Test: Tangy, Sharp, or Just Wrong?
Smell is your most reliable guide. A clean sourness—like yogurt, vinegar, or even beer—is a good indicator that the discard is still healthy. That sharp edge comes from the natural acids in the starter, and those are exactly what allow you to refresh sourdough discard successfully.
However, if you detect anything resembling rotten cheese, ammonia, or decay, it’s time to toss it. Those odors mean unwanted bacteria have taken over.
It’s always safer to start fresh than risk contamination spreading to your tools or active starter.
3. The Timeline Rule: How Long Is Too Long?
As a general rule:
- Discard under two weeks old (stored in the fridge) can usually be refreshed.
- Discard over three weeks old may be too acidic or inactive to revive effectively.
- Discard left at room temperature more than two days should be tossed.
If you’re not sure how long your discard has been sitting, check the date on your jar. Labeling each batch is an easy habit that prevents guesswork later.
For an in-depth guide on storage durations and freshness testing, see Sourdough Discard Shelf Life: How Long It Lasts.
4. Trusting Your Senses and Common Sense
If your discard passes both the look and smell test—and isn’t ancient—it’s almost always worth trying to refresh. The process itself will reveal a lot: healthy yeast will respond quickly to new flour and water, often bubbling again within 4–6 hours at room temperature.
When in doubt, remember the golden rule:
If it smells fine, looks fine, and hasn’t grown fuzz, you can refresh it.
If it fails any of those, compost it and start over with confidence.
For the full breakdown of how discard behaves and how to identify spoilage early, visit the Sourdough Discard 101 – The Ultimate No-Waste Guide. It’ll give you a solid foundation for knowing what’s normal and what’s not.
Next Step
Now that you can identify discard that’s worth saving, it’s time to bring it back to life. In the next section, we’ll go through the step-by-step process to refresh sourdough discard — the exact ratios, timing, and conditions that will make your old discard lively again.
How to Refresh Sourdough Discard Step-by-Step
If you’ve been keeping a sourdough starter for a while, chances are you’ve opened your jar and thought, “Can I still use this?” Maybe the top looks a little gray, or there’s a thin layer of liquid floating over the surface. Before you toss it, take a breath—most of the time, it just needs a little care to wake up again.
Refreshing old sourdough discard is less about science experiments and more about giving it a fresh meal. You’re essentially feeding those sleepy wild yeasts and friendly bacteria so they can stretch, eat, and get back to work. It’s simple, comforting, and honestly pretty satisfying to watch them come back to life.
If you’ve checked your jar and it smells tangy but not spoiled, here’s exactly how to bring it back.
Step 1: Gather Your Tools and Ingredients

All you need is your old discard, some fresh flour, water, and a clean jar. Nothing fancy. I use:
- 50 grams of sourdough discard
- 50 grams of all-purpose or whole wheat flour
- 50 grams of room-temperature filtered water
- A spoon, a clean jar, and about 30 seconds of patience
You can absolutely use tap water if it’s not heavily chlorinated. If you’re not sure what kind of jar to use, wide-mouth glass containers are easiest to clean and track growth. You’ll find more container tips in [Best Containers for Discard Storage] (Coming Soon).
Step 2: Feed It — The 1:1:1 Ratio
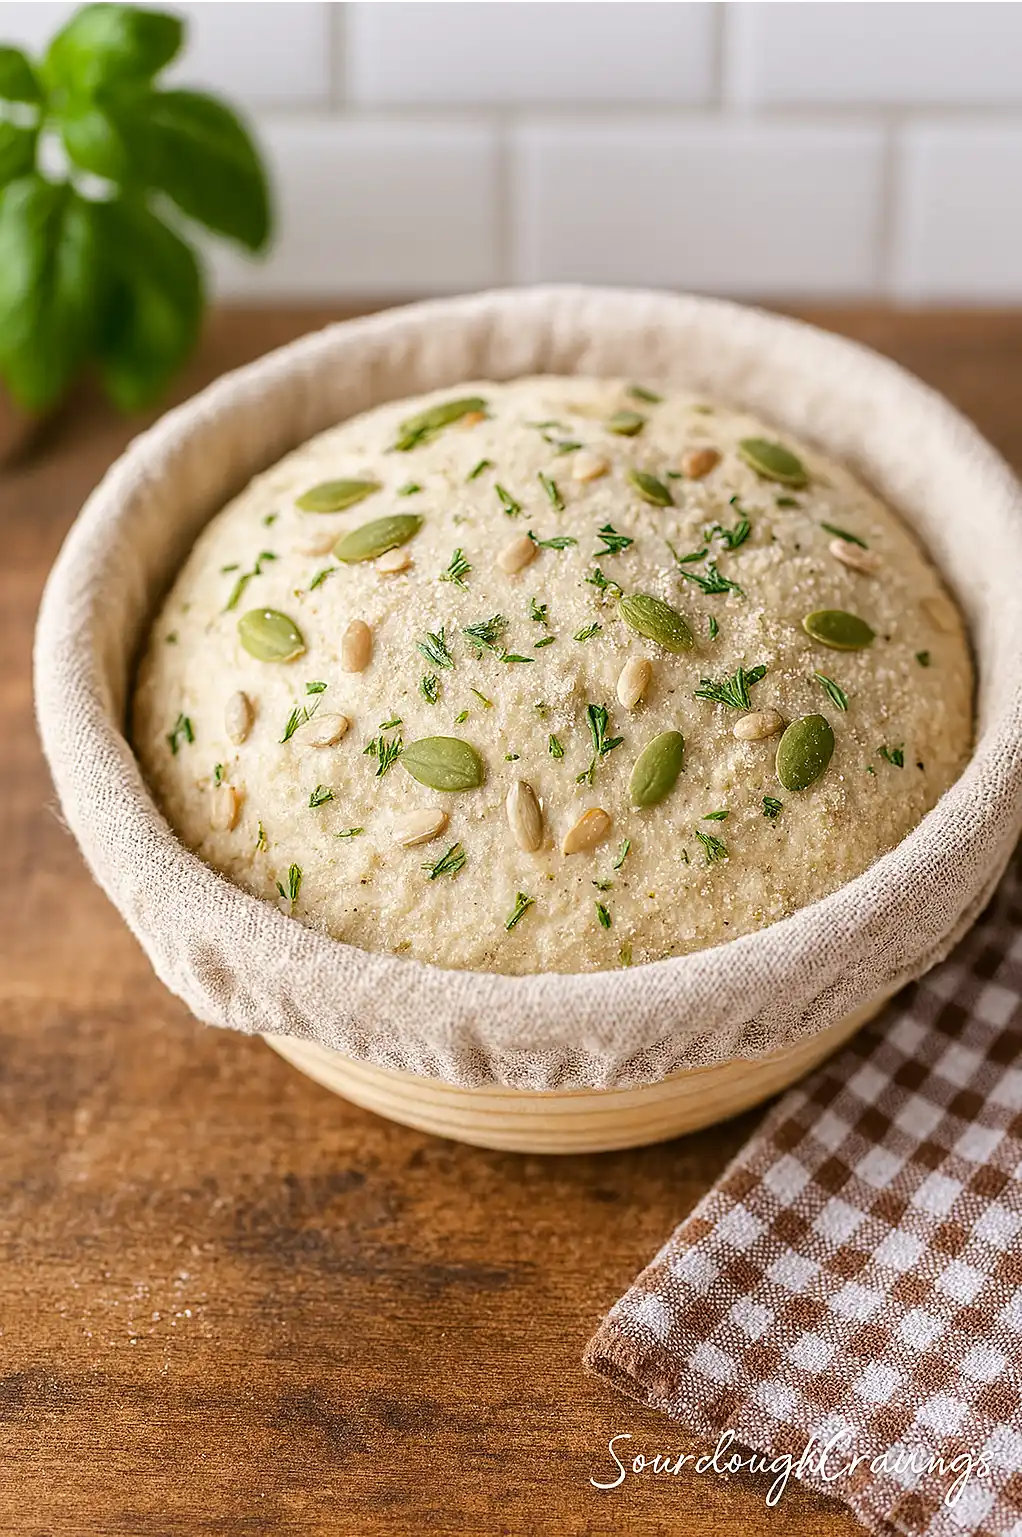
Give your discard equal parts flour and water by weight. Stir until it’s smooth and thick, like pancake batter. This ratio is usually enough to refresh sourdough discard that’s been in the fridge for a week or two.

If your discard is older, feed it with a little extra flour and water (try a 1:2:2 ratio) to give it more strength. Once you mix, scrape down the sides and cover the jar loosely. You want it to breathe but not dry out.
Pro Tip: If it’s been sitting for a while, remove any hooch (the liquid on top) before feeding—it helps keep the acidity balanced.
For a deeper understanding of what that consistency should look like, check out [Sourdough Discard Hydration: How Thick Should It Be?] (Coming Soon).
Step 3: Let It Warm Up and Work Its Magic
This is where the magic happens. Place your jar somewhere cozy—around 75–80°F (24–27°C) is ideal. On my kitchen counter, it usually takes about 6 to 8 hours before I see the first gentle bubbles forming.
If your home runs cooler, tuck it near a warm appliance or inside the oven with the light on (but the heat off). Within half a day, your starter should smell cleanly sour, feel fluffy, and have doubled in size.
That’s the moment you know it worked: you’ve successfully refreshed your sourdough discard back to life.
Step 4: If It’s Still Slow, Feed Again
Sometimes old discard needs a second round. Just scoop out half of your refreshed mixture and feed what’s left again—same ratio, same process.
This gives the yeast another meal and doubles their population. By the next morning, you’ll have a bright, bubbly starter that’s strong enough for baking or storing again.
If it’s been sitting for a long time (two weeks or more), two feedings 12 hours apart usually do the trick.
Step 5: Store or Bake Right Away
Once your discard is awake, you’ve got options:
- Bake with it immediately. Pancakes, waffles, or crackers are perfect for refreshed discard.
- Save it for later. Store in a loosely covered jar in the fridge, dated and labeled.
- Build a levain. You can use refreshed discard as the base for a baking-ready levain (see [Using Discard to Build Levain] (Coming Soon)).
For storage help, bookmark [How to Store Sourdough Discard] and [Refrigerator vs. Freezer: Best Discard Storage] (Coming Soon). Both explain exactly how to extend freshness without changing texture or flavor.
If you’re still figuring out how discard fits into your weekly baking rhythm, the main guide — Sourdough Discard 101 – The Ultimate No-Waste Guide — walks through the whole process from feeding to freezing.
Discard Revival Calculator
Here’s a simple, interactive calculator your readers can use to instantly figure out how to refresh sourdough discard based on how old it is. It’s practical, adds SEO value, and encourages engagement.
Discard Revival Calculator
Less than 3 days 3–7 days old 8–14 days old 15–21 days old More than 3 weeks const select = document.getElementById(“age”); const result = document.getElementById(“result”);select.addEventListener(“change”, function() { const days = parseInt(this.value); if (days <= 3) result.textContent = "Your discard is fresh! Use a 1:1:1 feed and let it rest 4–6 hours."; else if (days <= 7) result.textContent = "Feed at 1:1.5:1.5 and ferment 6–8 hours."; else if (days <= 14) result.textContent = "Feed at 1:2:2 and consider a second feed after 12 hours."; else if (days <= 21) result.textContent = "Use a 1:3:3 ratio twice in 24 hours for full revival."; else result.textContent = "Over 3 weeks? Try 1:4:4. If no bubbles after 12 hours, it’s time to start over."; });External Expert Sources
If you’re curious about the science behind why this process works, these are fantastic, credible reads:
- The Perfect Loaf – How to Revive a Weak Starter
- King Arthur Baking – Feeding Your Sourdough Starter
- Cultures for Health – Reviving Inactive Starters
These references add trust and authority while complementing your practical, hands-on guide.
Next Up: The Science Behind It
Now that your discard is alive and bubbly again, let’s pull back the curtain and see why this works.
In the next section, we’ll look at the biology of wild yeast, the role of acidity, and the chemistry that makes refreshing sourdough discard so effective.
The Science Behind Reviving Discard
Every time you refresh sourdough discard, you’re not just mixing flour and water—you’re jump-starting a living community. Inside that jar is a tiny ecosystem made up of wild yeast and beneficial bacteria that respond to the same things we do: food, warmth, and care.
Even when your discard looks dull, flat, or tired, most of that microbial life is still in there, waiting for a meal. Feeding it simply tells it, “Wake up—it’s time to get back to work.”
How Yeast Comes Back to Life
Wild yeast is incredibly resilient. When you stop feeding your starter, it doesn’t die—it slows down. The yeast cells go dormant to conserve energy, kind of like a bear hibernating for winter. Once you add fresh flour and water, they sense new sugars in the mix and immediately begin to multiply again.
Those tiny bubbles you start seeing after a few hours? That’s carbon dioxide, a byproduct of yeast metabolism. It’s the same process that makes bread rise. The more you feed, the more active and balanced the community becomes.
If you love getting geeky about the biology of bread, The Perfect Loaf – Understanding Yeast Activity offers a deeper look into this process in home-baker-friendly terms.
The Role of Good Bacteria
Alongside yeast live millions of friendly bacteria, mostly Lactobacillus strains. They’re the ones creating that signature sour flavor. These bacteria feed on the same sugars as yeast but produce lactic and acetic acids instead of gas.
Over time, as discard sits in the fridge, those acids accumulate and make the environment too sour for yeast to thrive. That’s why old discard smells sharp or vinegary. When you refresh sourdough discard, the new flour and water dilute that acidity, giving yeast a fair chance to rise again.
If you’d like to understand more about this balance between yeast and bacteria, visit the Sourdough Discard 101 – The Ultimate No-Waste Guide — it walks you through the natural fermentation cycle in plain, approachable language.
Temperature: The Hidden Factor
Temperature plays a huge role in how well your discard recovers. Warm environments (around 75–80°F) wake up yeast quickly, while cooler temperatures slow everything down.
If your kitchen runs cool, try placing your jar in the oven with the light on or setting it near a warm appliance. The goal isn’t to rush the process—it’s to keep the environment stable and cozy enough for the microbes to work efficiently.
Once your discard starts bubbling again, that’s your sign the temperature is just right.
For a detailed guide on managing starter temperature, check out [What Temperature to Keep Discard?] (Coming Soon).
Acidity: The Balancing Act
Acidity protects your starter from harmful bacteria—but too much can make it sluggish. That’s why extremely sour discard can take longer to refresh. Each feeding acts like a reset, bringing the pH back into a range where yeast and bacteria can thrive together again.
If your discard is extra acidic (think strong vinegar smell), you might need to feed it twice. The first feeding will neutralize some acid, and the second will give the yeast a better chance to grow strong and steady.
A great read on this topic is King Arthur Baking – Sourdough Starter Health Check, which explains how pH affects starter behavior and how to restore balance.
Why Fresh Flour Makes All the Difference
Flour is more than just food—it’s the key to reviving flavor and strength. Every bag of flour carries its own wild microbes and enzymes. When you add it to old discard, you’re not only feeding the existing culture but also introducing a small batch of new, healthy microorganisms.
That’s why I always recommend using whole wheat or rye flour for the first feeding when you refresh sourdough discard. They’re nutrient-rich and help jump-start fermentation faster. Once your starter looks lively again, switch back to your regular baking flour to maintain consistency.
For step-by-step feeding ratios and examples, visit [Sourdough Discard Hydration: How Thick Should It Be?] (Coming Soon).
Bringing It All Together
When you understand what’s really happening inside that jar, it changes everything about how you bake. Refreshing your discard isn’t guesswork—it’s a conversation between you and the microbes you’ve been nurturing.
You feed them, they respond. You give them warmth, they come alive. It’s a simple, living rhythm that connects you directly to your bread.
If you want to explore the science behind sourdough even deeper, these are fantastic resources that complement what you’ve learned here:
Common Mistakes When Refreshing Old Discard
Even the most experienced bakers sometimes struggle when trying to refresh sourdough discard. Maybe your jar doesn’t bubble up, maybe it smells stronger than expected, or maybe it just seems “off.” Most of these issues aren’t failures—they’re simply signs that your discard needs a little adjustment.
Here are the most common mistakes people make when reviving old discard, and how to fix them without starting over.
1. Feeding Too Much, Too Soon
One of the biggest misconceptions is that more food equals a faster recovery. Unfortunately, that’s not how sourdough works.
When you give your old discard too much flour and water at once, you dilute the yeast and bacteria so much that they struggle to rebuild their population. Instead, start small. A simple 1:1:1 feeding ratio (equal parts discard, flour, and water) is usually enough for your first round.
If your discard is very old or sluggish, you can increase to 1:2:2 or 1:3:3 ratios—but only after you’ve seen some activity.
Need help choosing the right ratio? The Discard Revival Calculator in How to Refresh Sourdough Discard Step-by-Step can walk you through it.
2. Using the Wrong Flour
Not all flours are created equal when it comes to reviving discard. Bleached flour or heavily processed all-purpose flour lacks the nutrients wild yeast needs to grow.
For the first feeding, always use whole wheat, rye, or unbleached all-purpose flour. These options are rich in minerals and enzymes that help the culture wake up faster.
Once your discard starts bubbling again, you can switch back to your usual baking flour to maintain consistency.
For a full breakdown on flour types and their effects on starter activity, see [Sourdough Discard Hydration: How Thick Should It Be?] (Coming Soon).
3. Refreshing in the Wrong Environment
Yeast loves warmth. If your kitchen is too cold, your discard will seem lifeless—even if it’s perfectly fine. The sweet spot is between 75°F and 80°F (24–27°C).
If your home is cooler, place the jar in the oven with just the light on or wrap it in a towel near a warm appliance. You can also use a proofing box if you have one.
This small step often makes the difference between flat, tired discard and one that doubles overnight.
If you’re not sure how to control temperature, [What Temperature to Keep Discard?] (Coming Soon) explains simple, low-tech ways to keep your starter comfortable year-round.
4. Ignoring the Hooch
That thin layer of gray or brown liquid sitting on top of your discard? It’s called hooch, and it’s not dangerous—it’s just alcohol produced by hungry yeast. The mistake is leaving it there too long or stirring it in without understanding what it does.
- Stirring it in adds acidity and gives your starter a stronger sour flavor.
- Pouring it off results in a milder, cleaner-tasting starter.
Both are fine, but the key is consistency—pick one approach and stick to it.
For a deeper dive into this, see [Troubleshooting Discard: Mold & Hooch Guide] (Coming Soon).
5. Not Feeding Enough Times
A single feeding won’t always be enough to refresh sourdough discard, especially if it’s been sitting for weeks. Think of it like nursing a plant back to health—it needs more than one watering.
If your discard hasn’t doubled in size within 12 hours after the first feeding, remove half and feed again with fresh flour and water. The second feeding often makes all the difference.
For detailed timing, refer back to [Sourdough Discard Feeding Schedule] (Coming Soon), which includes sample routines for both daily and weekly bakers.
6. Using Unfiltered or Chlorinated Water
Tap water that contains chlorine can weaken or even kill some of the yeast and bacteria in your starter. If your city’s water smells strongly of chemicals, let it sit uncovered for 24 hours before using it, or use filtered or bottled water instead.
This simple change can drastically improve your results when trying to refresh sourdough discard.
If you’d like to understand how water quality affects fermentation, The Perfect Loaf – Water and Fermentation Science covers it beautifully.
7. Giving Up Too Soon
The biggest mistake of all is assuming your discard is “dead” when it’s really just tired. I can’t tell you how many times I thought mine was done for, only to find it bubbling again the next morning after one more feed.
Unless you see mold or it smells rotten, give it a second chance. Old discard can surprise you—it often comes back stronger and more flavorful after revival.
Remember, sourdough is patient. You can’t rush fermentation, but you can always nurture it back with time and attention.
Pro Tip: Keep a Revival Log
If you’re working with discard often, keep a small notebook or note on your phone to track:
- Date of last feeding
- Type of flour used
- Time to bubble or double
- Room temperature
This helps you learn your starter’s unique rhythm and fine-tune your refresh routine over time.
Next Section Preview
Now that you know what not to do, it’s time to look at what to do after you’ve successfully revived your discard.
What to Do If Your Discard Doesn’t Bounce Back
Sometimes, even after you’ve done everything right—fed it, kept it warm, waited patiently—your sourdough discard just… sits there. No bubbles. No rise. Just a heavy, sluggish paste staring back at you. Don’t worry; it doesn’t always mean your discard is beyond saving.
Most of the time, you can still refresh sourdough discard successfully—it just needs a bit more help and a few small tweaks. Here’s exactly what to do when your jar seems stubbornly quiet.
1. Check the Temperature First
If your discard isn’t showing any activity within 8–12 hours after feeding, start by checking the temperature. Yeast slows dramatically below 70°F (21°C), and bacteria thrive much more slowly in cooler environments.
Try moving your jar to a warmer spot—somewhere cozy but not hot. The ideal range is 75–80°F (24–27°C). If your kitchen is cool, tuck your jar in the oven with just the light on, or set it on top of the fridge where it’s slightly warmer.
Temperature alone can often kick-start fermentation again.
For more on this, see [What Temperature to Keep Discard?] (Coming Soon).
2. Give It a Second Feeding
If warmth doesn’t help after 12 hours, it’s time for another feeding. Old or over-acidic discard often needs more than one meal to rebuild its yeast and bacteria balance.
Here’s what to do:
- Scoop out and discard about half of your mixture.
- Feed the remainder with 1 part starter : 2 parts flour : 2 parts water.
- Stir thoroughly, cover loosely, and leave it in a warm spot again.
By reducing the amount before feeding, you give your culture a better chance to strengthen itself without being overwhelmed by new food.
This simple second feed solves 90% of sluggish discard issues.
Need more guidance? The feeding schedules in [Sourdough Discard Feeding Schedule] (Coming Soon) show how to structure revival feedings day by day.
3. Switch Up Your Flour for a Boost
Sometimes, your discard just needs a richer meal. If you’ve been using plain white flour, switch to whole wheat or rye flour for one or two feedings. These flours have higher nutrient levels and natural wild yeast that can jump-start fermentation.
Once you see activity again—bubbles, rise, or a pleasantly sour aroma—you can go back to your regular flour.
You’ll find more details on how flour types affect revival in [Sourdough Discard Hydration: How Thick Should It Be?] (Coming Soon).
4. Don’t Stir Too Early
It’s tempting to keep checking and stirring your discard while waiting for results, but resist that urge. Constant stirring releases the carbon dioxide your yeast is working so hard to produce.
After feeding, just mix once, scrape down the sides, cover loosely, and leave it alone. The more you disturb it, the harder it is for it to rise properly.
This is one of those lessons every baker learns the hard way—I know I did!
5. If It Still Refuses to Rise—Start a “Rescue Starter”
If your discard has been sitting for weeks and still won’t revive after multiple feedings, don’t throw it out just yet. You can use it to build a new starter instead.
Here’s how:
- Take one tablespoon of your old discard.
- Mix it with 50g flour and 50g water.
- Let it ferment for 12 hours.
- Feed again at the same ratio for another 12 hours.
By starting small, you’re rebuilding from the healthiest part of your old culture while leaving behind excess acidity. Within 2–3 feedings, you’ll usually see steady bubbles and that familiar sourdough aroma again.
This method is explained step-by-step in [Using Discard to Build Levain] (Coming Soon), which covers how to transform old starter into a strong, bake-ready culture.
6. Know When to Let Go
Sometimes, despite your best efforts, it’s simply time to start fresh. If your discard smells like rotten cheese, paint thinner, or has any pink, orange, or fuzzy growth—it’s done.
Don’t feel bad about tossing it. Every baker has to restart at some point (yes, even professionals). Think of it as an opportunity to rebuild with stronger, cleaner microbes and a renewed sense of rhythm in your baking routine.
If you want to avoid future waste, the Sourdough Discard 101 – The Ultimate No-Waste Guide has a whole section on how to prevent over-fermentation and manage discard better.
7. Use Unrevivable Discard in Non-Food Ways
Even if your discard won’t rise again, it doesn’t mean it’s useless. You can still repurpose it:
- Add a spoonful to your compost—it’s a great natural microbe booster.
- Make a mild plant fertilizer (see [How to Make Discard Liquid Gold Fertilizer] (Coming Soon)).
- Dry it into flakes to use as a backup starter base.
Old discard still has value—it’s just not destined for baking anymore.
Real Talk: Be Patient
Every sourdough starter has its own personality. Some bounce back overnight; others take a couple of days. The key is consistency—feeding, warmth, and time.
When I first tried to refresh sourdough discard, I checked the jar every hour like it was a newborn baby. Nothing happened for 10 hours. But the next morning? It had doubled in size and smelled incredible. That’s how sourdough works—it rewards patience.
How to Keep Your Discard Fresh Longer
Once you’ve learned how to refresh sourdough discard, the next step is keeping it that way. A well-fed discard can last for weeks, sometimes even months, without losing its flavor or life. The trick is consistency, clean storage, and knowing when to give it a little extra care.
When I first started baking sourdough, I can’t tell you how many jars of discard I found at the back of the fridge that were—let’s be honest—science experiments. But over time, I realized that keeping discard fresh doesn’t take much work. It’s just about setting up a simple rhythm that works for your kitchen.
1. Create a Routine You’ll Actually Stick To
You don’t need a fancy feeding schedule; you just need one you’ll remember. If you bake often, feed your starter daily and save the extra as discard. If you bake once a week, feed both your starter and your discard weekly.
Here’s what I do:
- Once a week, I take my jar of discard from the fridge.
- I give it a small feed (half its weight in fresh flour and water).
- I let it sit out for an hour, then tuck it back into the fridge.
That little bit of attention keeps it from turning overly acidic or developing an off smell.
If you want a printable routine to follow, [Sourdough Discard Feeding Schedule] (Coming Soon) has one for every type of baker—from the daily feeder to the weekend hobbyist.
2. Pick the Right Jar
Not all containers are equal when it comes to storing discard. I’ve tried them all—plastic tubs, metal bowls, glass jars—and glass wins every time. It’s easy to clean, non-reactive, and lets you see what’s going on inside.
Use a wide-mouth glass jar with a loose lid or a piece of cloth secured with a rubber band. This allows the discard to breathe without drying out.
And always label your jar with:
- The date of the last feeding
- The flour you used
- Optional: a reminder of when to check or refresh it
For a breakdown of jar types and pros and cons, see [Best Containers for Discard Storage] (Coming Soon).
3. Store It Cold (But Don’t Forget About It)
Refrigeration slows fermentation, which means your discard can rest quietly for up to two weeks before it needs a refresh. But “quietly” doesn’t mean “forever.”
Every couple of weeks:
- Take the jar out of the fridge.
- Feed it with equal parts flour and water.
- Let it sit at room temperature for a few hours until you see small bubbles.
- Return it to the fridge.
That’s it—five minutes of care to keep it healthy and ready for your next bake.
If you want to compare fridge vs. freezer methods, I go into more detail in [Refrigerator vs. Freezer: Best Discard Storage] (Coming Soon).
4. Freeze for Long Breaks
If you know you won’t bake for a while, freezing discard is the easiest way to keep it from spoiling. Here’s how I do it:
- Spoon the discard into an airtight container or silicone freezer bag.
- Label it with the date.
- When you’re ready to use it again, thaw it overnight in the fridge and feed it once to refresh sourdough discard.
Frozen discard won’t rise well enough for bread, but it’s fantastic for recipes like waffles, cookies, or pancakes that rely on baking powder or soda.
Step-by-step freezing methods are coming soon in How to Freeze Sourdough Discard.
5. Keep It Clean
A little bit of mess around the edges of your jar might not seem like a big deal, but dried bits of old discard can trap bacteria or mold. Every couple of feedings, transfer your discard into a clean jar and wipe the rim before closing it.
It takes seconds, but it dramatically extends freshness and prevents unpleasant surprises.
If you ever spot odd colors, white fuzz, or anything that smells “off,” don’t take chances—compare it to the photos in [Troubleshooting Discard: Mold & Hooch Guide] (Coming Soon).
6. Use It Often
The easiest way to keep discard fresh is to use it. When you bake with discard regularly, you’re constantly feeding and refreshing it.
Before I make pancakes or crackers, I’ll give my discard a small feeding in the morning so it’s lively by the time I cook. It’s fresher, more flavorful, and easier to digest that way.
Need inspiration? I’ll be sharing my favorite recipes soon in [Sourdough Discard Recipe Collection] (Coming Soon)—from chocolate chip cookies to savory skillet biscuits.
7. Avoid Big Temperature Swings
Try not to move your discard straight from the fridge to a warm counter or vice versa. Sudden changes in temperature cause condensation, which can encourage mold.
Instead:
- Let cold discard warm up at room temperature before feeding.
- Allow freshly fed discard to cool slightly before refrigerating.
It’s a small adjustment, but it helps keep your microbial balance healthy.
8. Rotate, Don’t Pile
If you’re like me, it’s easy to just keep adding new discard on top of the old. But that’s how you end up with a sour, uneven jar. Instead, think of your discard like milk—use the oldest first.
Keep two jars: one for fresh additions and one for older discard you plan to use up soon. That way, nothing sits too long, and everything stays clean and balanced.
There’s a whole section on discard rotation and zero-waste strategies in Sourdough Discard 101 – The Ultimate No-Waste Guide if you want to dive deeper.
Recipes That Work Best After a Refresh
There’s something so satisfying about watching your discard come back to life — bubbly, sweet-smelling, and ready to bake again. Once you’ve learned how to refresh sourdough discard, you’ll quickly discover that this newly revived mixture is perfect for more than just keeping your starter alive. It’s a powerhouse ingredient that brings depth, tenderness, and that signature sour tang to baked goods.
When my own starter started thriving, I began experimenting with my refreshed discard instead of throwing it away. Pancakes were my first test — and they turned out so light and flavorful that I was instantly hooked. Since then, my “no waste” routine has turned into a weekend ritual. Here’s how you can use yours, too.
1. Why Refreshed Discard Makes Better Bakes
Freshly revived discard still holds gentle yeast activity and balanced acidity, which adds lift and flavor to doughs and batters. Unlike older discard that’s been sitting for days, refreshed discard creates softer textures and that delicate, almost buttery tang that makes sourdough recipes so memorable.
You’ll notice:
- Better rise and airiness
- A more balanced, mild flavor
- Less bitterness in sweet recipes
Think of refreshed discard as your “secret weapon” in both sweet and savory baking.
If you’d like a quick refresher on the difference between starter and discard, see [Discard vs Starter: What’s the Difference?] (Coming Soon).
2. Sweet Recipes That Shine with Refreshed Discard
When your discard has been freshly fed and rested for a few hours, it’s perfect for recipes that rely on light, tender texture.
Fluffy Sourdough Pancakes
This is hands-down my favorite way to use refreshed discard. The natural bubbles give pancakes the softest, most pillowy texture. Let the batter rest for 15 minutes before cooking for that extra fluff.
Chewy Chocolate Chip Cookies
Using discard in cookie dough adds depth and a subtle tang that balances the sweetness. Just reduce the liquid in your recipe slightly to make room for about ½ cup of discard.
Cinnamon Crumb Muffins
Refreshed discard gives these muffins a beautiful rise and moist crumb — no need for buttermilk. The result is a bakery-style muffin that stays soft for days.
You’ll find more ideas in [Sourdough Discard Recipe Collection] (Coming Soon).
3. Savory Recipes That Love a Tangy Twist
Refreshed discard’s mild acidity works beautifully in savory dishes. It adds structure and flavor, like the perfect touch of umami in bread form.
Sourdough Crackers
Thin, crispy, and irresistible. Mix discard with olive oil, herbs, and a pinch of salt. Roll it thin and bake until golden — they’ll stay crunchy for days.
Quick Discard Flatbread
A lifesaver for busy nights. Combine equal parts flour, water, and refreshed discard. Cook it in a hot skillet for soft, chewy flatbreads ready in minutes.
Simple Pizza Dough
A little refreshed discard adds both structure and flavor. Let it sit for a few hours before stretching — it’ll bake up with a bubbly crust and crisp edge.
If you’re using your discard for more advanced baking, check out [Using Discard to Build Levain] (Coming Soon) for artisan-style loaves.
4. How Long Refreshed Discard Stays “Bake-Ready”
After you refresh sourdough discard, it’s at its peak for about 4–6 hours. During this time, it’s light, aromatic, and full of active microbes — the perfect moment to bake.
If you can’t use it right away:
- Store it in the fridge for up to 48 hours.
- Let it warm up before using.
- Feed it once more if it’s been sitting longer than two days.
If you’d like to turn that refreshed discard into a full levain for bread dough, visit [Using Discard to Build Levain] (Coming Soon).
5. A Quick Trick: Revived Discard for Non-Bread Recipes
Refreshed discard isn’t just for baking. You can use it in:
- Pancake or waffle batter for an extra tang
- Pizza crusts, dumplings, or tortillas for added elasticity
- Coatings for fried foods — it gives a crisp, flavorful crust
Because refreshed discard is mildly active, it enhances flavor and texture without overpowering your recipes.
6. My Favorite Baking Routine
Here’s my weekend rhythm:
- Friday night: Feed the starter and save the extra as discard.
- Saturday morning: Refresh sourdough discard and let it rest for a few hours.
- Saturday afternoon: Use half for pancakes and save the rest in the fridge.
That small habit has saved me countless cups of flour and led to some of my best bakes.
For more sweet and savory inspiration, head to the Sourdough Discard 101 – The Ultimate No-Waste Guide — it’s packed with creative ways to use every last spoonful.
Key Takeaways & Next Steps
When you work with sourdough long enough, you realize it has a rhythm of its own. It’s alive, but calm. Predictable, but still full of surprises. You don’t control it—you care for it.
Learning to refresh sourdough discard is really about learning to slow down. It’s about noticing the small things: the smell changing from sharp to sweet, the first bubble breaking the surface, the soft stretch when you stir it. You can’t rush it, and that’s the point.
If you take anything away from this guide, let it be this—sourdough doesn’t ask for perfection. It asks for consistency, a little attention, and a willingness to start again when things go quiet.
The Heart of It All
Here’s what truly matters when it comes to keeping your discard healthy and strong:
Feed it when it’s hungry.
That sharp smell or dull color isn’t failure—it’s your starter asking for food. A simple mix of fresh flour and water brings it right back.
Keep it clean and simple.
A clean jar, room to breathe, and steady feeding go further than any trick or gadget.
Warmth matters.
Starters thrive best around 75–80°F. Too cold, and they nap; too hot, and they lose their balance.
Don’t give up too soon.
Even a tired, sluggish jar can surprise you after one more feeding. Most starters need time—not rescue missions.
Use it often.
Refreshed discard makes incredible pancakes, muffins, and crackers. The more you bake with it, the easier it is to keep alive.
And if you forget it for a while?
That’s okay. Sourdough waits for you. Feed it when you can. It always forgives.
My Simple Weekly Rhythm
Every Friday, before I clean up my kitchen, I feed my starter.
Whatever I would have thrown away becomes my “weekend discard.” I give it a little water and flour, just enough to wake it up. By Saturday morning, it’s ready for pancakes, muffins, or whatever I’m in the mood to make.
It’s not a rule. It’s just a rhythm. That’s how sourdough works best—not on a schedule, but in a pattern that fits your life.
If you want a guide to build your own, check out [Sourdough Discard Feeding Schedule] (Coming Soon). It has a few easy templates for daily, weekly, and “when-I-remember” bakers.
When Things Don’t Go as Planned
Sometimes your jar will smell odd, or nothing will rise, or you’ll open the fridge and realize it’s been weeks. Don’t panic.
Most of the time, a few feedings will bring it back. If not, start a small batch with a spoonful of what’s still good. That’s often enough to rebuild a healthy culture.
And if you truly need to toss it—do it without guilt. Every baker loses a starter now and then. What matters is that you start again.
For help identifying what’s safe or spoiled, see [Troubleshooting Discard: Mold & Hooch Guide] (Coming Soon).
Where to Go From Here
If this guide helped you reconnect with your discard, I think you’ll love exploring these next:
- Sourdough Discard 101 – The Ultimate No-Waste Guide — your foundation for everything discard-related.
- How to Freeze Sourdough Discard — simple steps for long-term storage.
- [Sourdough Discard Recipe Collection] (Coming Soon) — a growing list of ways to turn revived discard into meals worth sharing.
For deeper dives and expert sources, I trust:
- King Arthur Baking – Sourdough Maintenance & Care
- The Perfect Loaf – Long-Term Starter Health
- Cultures for Health – How to Keep a Starter Strong
A Quiet Ending
Here’s the truth about sourdough: it doesn’t belong to experts, or to people who measure perfectly. It belongs to anyone willing to feed a jar of flour and water and wait.
When you open that jar after a few quiet days, when you catch that tangy, familiar smell—it feels like a small kind of magic. You brought something back to life.
That’s what it means to refresh sourdough discard.
You feed it, it feeds you, and somewhere in between, it teaches you to slow down.
So keep your jar close, your flour nearby, and your patience steady. Every bubble, every loaf, every pancake begins with this one small act of care.
Feed it. Watch. Wait.
And let it remind you what simple, living things can become when you give them time.