My Morning Ritual Meets Sourdough
Mornings in my kitchen always begin with the rich scent of freshly brewed coffee drifting through the air, the quiet hum of the kettle, and the satisfying warmth of a well-worn mug in my hands. For years, I enjoyed that ritual alongside a thick slice of homemade sourdough. One crisp winter day, I decided to merge those two comforts into a single bake—and that’s how my espresso cocoa sourdough came to life.

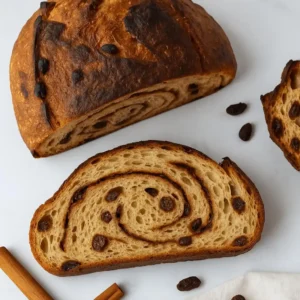
From the very first slice, I knew this bread was something special. Espresso cocoa sourdough layers the deep, roasty character of espresso powder with the smooth, indulgent taste of Dutch-process cocoa. The texture is airy yet moist, and every bite offers a perfect balance between tangy sourdough and bittersweet chocolate notes.
The first loaf of espresso cocoa sourdough I pulled from the oven filled my home with an aroma somewhere between an artisan bakery and a specialty coffee shop. Served warm with a little salted butter, it’s pure comfort. Now, it’s my go-to bake for cozy weekends, breakfast spreads, and even dessert-worthy slices.
If you’ve been exploring the flavors in the Sweet Mix-Ins Guide, this espresso cocoa sourdough is an unforgettable addition. It pairs naturally with your morning cup, makes indulgent French toast, and is just as good as an afternoon pick-me-up with a dusting of powdered sugar.
Espresso Cocoa Sourdough – Bold Flavor Meets Chocolate Comfort
Ingredients
Equipment
Method
- Whisk together bread flour, Dutch-process cocoa, and espresso powder in a bowl.

- Add water and active sourdough starter; mix until the dough is shaggy.
- Rest for 30 minutes (autolyse).
- Add salt and optional brown sugar; knead or perform stretch-and-folds until smooth.
- Bulk ferment for 4–6 hours at room temperature, performing gentle folds every 30–40 minutes early on.
- Shape and place seam-side up in a floured banneton; proof overnight in the refrigerator.
- Preheat a Dutch oven to 475 °F (245 °C). Transfer the dough on parchment, score, and bake 20 minutes covered, then 20–25 minutes uncovered.
- Cool completely before slicing.


Nutrition
Notes
Loved this recipe?
Leave a rating & comment. how it was!Table of Contents
What Is Espresso Cocoa Sourdough?
Espresso cocoa sourdough is what happens when the bold, roasty notes of coffee meet the deep, velvety richness of cocoa in a naturally leavened loaf. It’s not overly sweet like a chocolate cake, but it’s also far from plain—this bread has layers of flavor that reveal themselves with every bite. The tangy backbone from long-fermented sourdough makes the chocolate taste richer, while espresso powder adds a subtle bitterness that keeps everything balanced.
Baking espresso cocoa sourdough isn’t about dumping brewed coffee into your dough—it’s about using concentrated espresso powder to intensify the flavor without throwing off your hydration. This is a tip I picked up from King Arthur Baking years ago, and it’s one I swear by. Espresso powder works almost like a spice here—blending in seamlessly with the cocoa for a loaf that smells like a café and tastes like a bakery treat.
Unlike a double chocolate sourdough or a mocha-style bread, espresso cocoa sourdough tends to be less sweet, more robust, and a bit more sophisticated. It’s the bread you want when you’re craving depth and character, the kind that pairs just as well with a pat of salted butter as it does with a drizzle of honey.
| Bread Type | Sweetness Level | Flavor Notes |
|---|---|---|
| Espresso Cocoa Sourdough | Low–Medium | Bold coffee aroma, rich cocoa, tangy sourdough finish |
| Double Chocolate Sourdough | Medium–High | Sweet chocolate chunks, mild cocoa flavor |
| Mocha Sourdough | Medium | Balanced coffee and chocolate blend, softer tang |
📌 Flavor comparison between espresso cocoa sourdough and other chocolate-style breads
Key Ingredients for Espresso Cocoa Sourdough
The magic of espresso cocoa sourdough comes down to a few thoughtfully chosen ingredients. Each one has a role to play in creating that signature bold flavor and tender crumb.

Flour, Cocoa, and Espresso Powder
A strong bread flour provides the structure this loaf needs to rise beautifully despite the weight of cocoa and espresso. I like using Dutch-process cocoa for its smoother, less acidic profile, which pairs beautifully with the roasty punch of espresso powder. The cocoa adds richness without turning the bread into a dessert, while the espresso powder gives depth without overpowering the sourdough tang.
When choosing espresso powder, look for one made specifically for baking—not instant coffee granules. Baking-grade espresso powder dissolves instantly, blends evenly into the dough, and won’t leave gritty bits behind. This ensures your espresso cocoa sourdough bakes up with a uniform flavor from crust to crumb.
Optional Add-Ins: Chocolate Chips, Hazelnuts, Orange Zest
Once you’ve mastered the base recipe, it’s fun to play with add-ins. Dark chocolate chips melt into pockets of bittersweet richness, while chopped hazelnuts bring a satisfying crunch. Orange zest can add a fragrant, citrusy lift that brightens the cocoa and espresso.
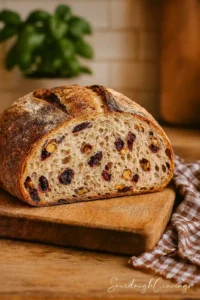
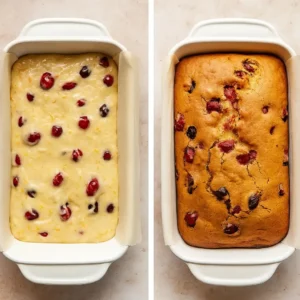
One of my favorite flavor twists came when I paired this loaf with dried cranberries, inspired by my Cranberry Orange Sourdough. The bright pop of tangy fruit beautifully balanced the deep, earthy bitterness of the base.
Ingredient Substitution Guide for Espresso Cocoa Sourdough
| Ingredient | Suggested Swap | Effect on Flavor |
|---|---|---|
| Dutch-process cocoa | Natural cocoa | Slightly sharper, more acidic chocolate notes |
| Espresso powder | Decaf espresso powder | Same flavor, caffeine-free |
| Dark chocolate chips | Milk chocolate chips | Sweeter, creamier pockets of chocolate |
📌 Swaps and optional add-ins for espresso cocoa sourdough
How to Make Espresso Cocoa Sourdough
Crafting espresso cocoa sourdough is like blending the comfort of homemade bread with the indulgence of your favorite coffeehouse drink. With a steady pace and attention to detail, you’ll pull a loaf from the oven that’s deep, aromatic, and incredibly satisfying.
Step 1: Mix the Dough

In a large bowl, whisk bread flour, Dutch-process cocoa, and espresso powder until well combined. Stir in your active sourdough starter and water, mixing until the dough just comes together. Let it rest for half an hour so the flour can fully absorb the liquid.
Step 2: Add Salt and Sweetness
After the rest, scatter salt over the dough along with a spoonful of brown sugar if you like a smoother finish. The sugar balances the coffee’s boldness while enhancing the cocoa’s richness. Work the dough gently with your hands or perform a few folds until it feels soft and cohesive.
Step 3: Bulk Fermentation
Let your espresso cocoa sourdough rest in a covered bowl at a cozy room temperature for 4–6 hours, giving it time to develop its rich, aromatic flavor. In the first couple of hours, return to the bowl every 30–40 minutes to fold the dough gently. These folds help it trap air, leading to a lighter texture and a beautiful rise.
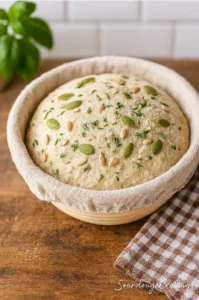
Step 4: Shape and Proof
Transfer your dough onto a floured counter and coax it into a smooth round or oval. Nestle it seam-side up in a banneton, then cover it well. Let it chill in the fridge overnight—anywhere from 12 to 16 hours—so the flavors deepen and the structure sets.
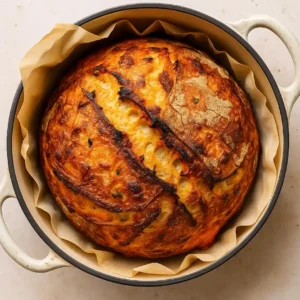
Step 5: Bake to Perfection
Place your Dutch oven in the oven and preheat to 475°F (245°C). Once it’s hot, carefully move your espresso cocoa sourdough to parchment paper, score it boldly, and bake with the lid on for 20 minutes. Remove the lid and continue baking until the crust is a deep, chocolatey brown and your kitchen smells like a coffeehouse dream.

Two-Day Plan for Espresso Cocoa Sourdough
| Day | Time | Step |
|---|---|---|
| Day 1 | Morning | Mix ingredients, rest 30 min |
| Day 1 | Late Morning | Add salt/sugar, folding |
| Day 1 | Afternoon | Finish bulk fermentation |
| Day 1 | Evening | Shape, refrigerate overnight |
| Day 2 | Morning | Bake and cool completely |
📌 Two-day baking plan for espresso cocoa sourdough
Baking Tips & Storage Tricks
Baking espresso cocoa sourdough is all about balancing bold flavor with perfect texture. Over the years, I’ve learned a few tricks that turn a good loaf into a bakery-worthy centerpiece — without adding stress to your kitchen routine.
Baking Tips
- Score Deep and Bold
Cocoa in dough can make the crust slightly denser, so don’t be shy with your scoring. A sharp blade and a confident slash will give your espresso cocoa sourdough that gorgeous, blooming ear. - Steam for Shine
Even in a Dutch oven, a little extra steam in the first 10 minutes helps the crust stay supple while the loaf expands. I enjoy adding a handful of ice cubes to the pot right before sealing the lid. - Temperature Check
Bread is done when the internal temperature reaches about 205°F (96°C). This ensures the center is baked through while keeping the crumb moist. - Flavor Boosters
A pinch of cinnamon or cardamom can add surprising warmth to espresso cocoa sourdough, pairing beautifully with its chocolatey aroma.
Storage Tricks
- Room Temperature (Short Term)
Store sliced loaf in a breathable bread bag or wrapped in a clean tea towel for up to 2 days. Avoid plastic unless you prefer a softer crust. - Freezing (Long Term)
Cut into portions, wrap them in parchment, and place in a freezer-safe bag for storage of up to three months. Thaw at room temperature or refresh in the oven for 10 minutes. - Reviving the Crust
To bring back that fresh-baked crunch, spritz the loaf lightly with water and warm in a 350°F (175°C) oven for 5–7 minutes.
| Storage Method | Best Duration | Result |
|---|---|---|
| Room Temp (Tea Towel) | 1–2 days | Crisp crust, soft crumb |
| Plastic Bag | 1–2 days | Soft crust, chewy crumb |
| Freezer (Wrapped Slices) | Up to 3 months | Fresh taste after reheating |
📌 Espresso cocoa sourdough storage methods and results
Pro Tip: If you’re gifting this loaf, wrap it in parchment and tie with baker’s twine — not only does it look charming, but it also helps the espresso cocoa sourdough breathe until it’s enjoyed.
For a deep dive into storing enriched dough breads, I recommend reading The Perfect Loaf’s bread storage guide — they break down exactly how moisture and temperature affect freshness.
Baking Tips & Storage Tricks
Baking espresso cocoa sourdough isn’t just about following a recipe — it’s about knowing those little tricks that turn a tasty loaf into something extraordinary. This rich chocolate and coffee creation rewards careful baking, offering enjoyment for both experienced bakers and newcomers to sourdough.
Baking Tips
- Confident Scoring
The rich cocoa color in espresso cocoa sourdough can make expansion lines harder to see, so slash boldly with a sharp blade. That confident score is what gives your loaf its stunning ear. - Controlled Steam
Even inside a Dutch oven, I like to toss in two ice cubes right before closing the lid. This added steam keeps the espresso cocoa sourdough crust supple during its oven spring. - Bake to Temp, Not Just Time
Check for an internal temp of 205°F (96°C). It ensures the center is fully baked without sacrificing the tender crumb. - Flavor Twists
Mix in a touch of cardamom or a hint of orange zest. You’ll get a Best Sourdough Inclusions-worthy flavor layer that plays beautifully with cocoa.
Storage Tricks
- Short-Term (Room Temperature)
Wrap cooled espresso cocoa sourdough in a clean tea towel or place it in a breathable bread bag. This keeps the crust crisp for 48 hours. - Long-Term (Freezing)
Slice, wrap in parchment, and seal in a freezer bag. It’ll stay delicious for up to three months. Thaw at room temp, then refresh in the oven for 8 minutes at 350°F (175°C). - Crust Revival
For day-old slices, spritz lightly with water before warming in the oven. You’ll get that bakery-fresh snap back in minutes.
| Storage Method | Best Duration | Texture Result |
|---|---|---|
| Tea Towel or Bread Bag | Up to 2 days | Crisp crust, soft crumb |
| Plastic Bag | 1–2 days | Soft crust, chewier crumb |
| Freezer (Wrapped Slices) | Up to 3 months | Fresh after reheating |
📌 Espresso cocoa sourdough storage guide for best freshness
Pro Tip: If gifting this loaf, wrap it in parchment and tie with baker’s twine. It not only looks rustic and beautiful, but also allows the espresso cocoa sourdough to breathe naturally during transport.
For more science-backed bread storage tips, check out The Perfect Loaf’s bread storage guide — it’s a goldmine for home bakers.
Frequently Asked Questions about Espresso Cocoa Sourdough
1. Can I make espresso cocoa sourdough without a Dutch oven?
Absolutely. While a Dutch oven helps create that gorgeous crust by trapping steam, you can still bake espresso cocoa sourdough on a baking stone or steel. Just preheat your oven well, add a shallow pan of hot water to the bottom rack for steam, and keep a close eye on the loaf during the first 20 minutes.
2. What’s the best cocoa to use for espresso cocoa sourdough?
Dutch-process cocoa is my go-to for espresso cocoa sourdough because it blends smoothly with the espresso’s boldness. It also gives the loaf that deep chocolate aroma and dark, rich crumb. Natural cocoa works too, but the flavor will be a bit sharper.
For an in-depth comparison, King Arthur Baking’s cocoa guide is a fantastic read.
3. Can I use instant coffee instead of espresso powder?
You can, but the flavor won’t be as intense. Espresso powder is finely ground and roasted specifically to dissolve easily in dough, giving espresso cocoa sourdough a deeper coffee kick. If using instant coffee, double the amount for a closer match.
4. How should I store espresso cocoa sourdough to keep it fresh?
Cool the loaf completely, wrap it in a tea towel, and keep it in a bread bag at room temperature for up to 2 days. For longer storage, freeze pre-sliced espresso cocoa sourdough in a sealed freezer bag. When ready to enjoy, thaw at room temp and refresh in a 350°F (175°C) oven for 8 minutes.