If you’ve ever wondered how to make a sourdough starter, you’re not alone—and you’re in exactly the right place.

Every incredible loaf of sourdough bread begins with one magical, bubbly foundation: the sourdough starter. And despite what most blogs or Instagram bakers might have you believe, making your own sourdough starter isn’t complicated. You don’t need to buy anything fancy. You don’t need a secret packet of yeast. You definitely don’t need a backup culture from a bakery in San Francisco.
What you do need? Flour, water, and a little patience. That’s it.
In this beginner’s guide, I’ll walk you step by step through how to make a sourdough starter from scratch—the real, low-fuss way that works every time. I’ve coached dozens of new bakers through the process, and I’m going to help you avoid the most common mistakes (like giving up too early, or freaking out about smells). Whether your kitchen is a high-rise apartment or a rustic farmhouse, this guide is designed to work anywhere.
Espresso Cocoa Sourdough – Bold Flavor Meets Chocolate Comfort
Ingredients
Equipment
Method
- In a large bowl, whisk together the bread flour, Dutch‑process cocoa, and espresso powder until evenly combined.
 4")
- Add the water and active sourdough starter; mix until the dough is shaggy and no dry spots remain. Rest 30 minutes (autolyse).
- Sprinkle in the salt and optional brown sugar. Knead briefly or perform several stretch‑and‑folds until the dough feels smooth and cohesive.
- Bulk ferment 4–6 hours at warm room temperature, performing gentle folds every 30–40 minutes during the first couple of hours.
- Shape into a round or oval and place seam‑side up in a floured banneton. Cover and cold proof overnight (12–16 hours) in the refrigerator.
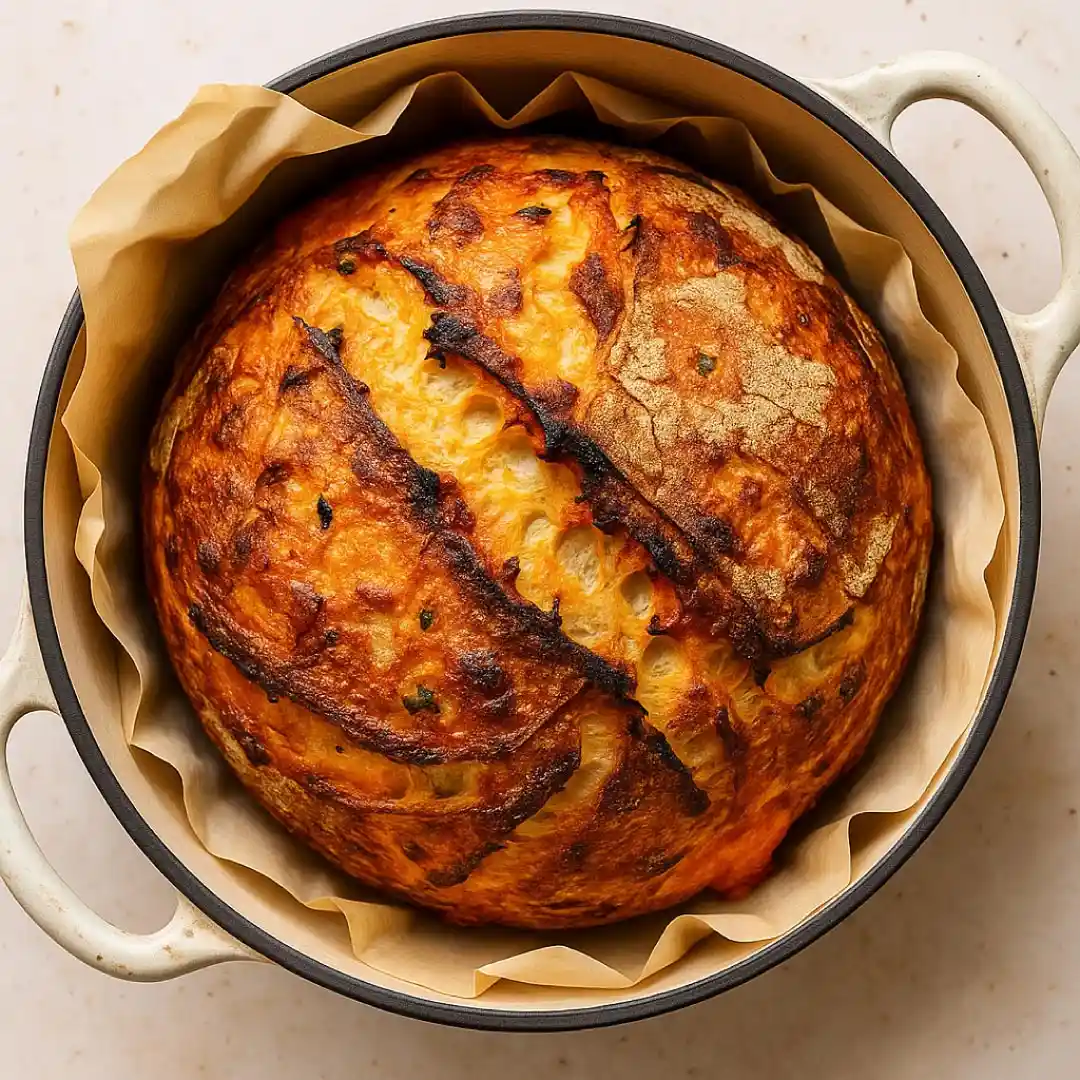
- Preheat a Dutch oven to 475°F (245°C). Transfer dough to parchment, score boldly, and bake 20 minutes covered, then 20–25 minutes uncovered until deeply browned (≈205°F/96°C internal). Cool completely before slicing.
 4")
 5")
 6")
 7")
Nutrition
Notes
Loved this recipe?
Leave a rating & comment. how it was!We’ll cover:
- What a sourdough starter is and why it works
- What tools and flours you need (spoiler: not many)
- A foolproof 7-day starter plan
- How to tell when your starter is ready
- What to do when things go wrong
- And what comes next (baking, storing, or scaling)
So, if you’re ready to skip the over-complicated advice and finally learn how to make a sourdough starter the easy, science-backed way, you’re in for a treat.
Let’s get started.
Table of Contents
What Is a Sourdough Starter?

At its core, a sourdough starter is a living, breathing mixture of just two ingredients: flour and water. But what actually makes it come alive—and gives your sourdough bread that signature rise and tang—is the invisible world of wild yeast and beneficial bacteria.
When you learn how to make a sourdough starter, what you’re really doing is cultivating a natural fermentation system. Unlike commercial yeast that comes in a packet, wild yeast already lives on flour, in the air, and even on your hands. By mixing flour and water, you create the perfect environment for those microbes to grow.
Over time—usually 5 to 7 days if done properly—this mixture becomes active, bubbly, and acidic. That’s your starter. Once it’s strong enough, it becomes the natural leavening agent that replaces store-bought yeast entirely.
So yes, you can bake crusty, flavorful bread without ever buying yeast again.
Think of your sourdough starter like a kitchen pet. Feed it regularly, keep it warm, and it’ll reward you with amazing loaves, pancakes, muffins, and more.
The Two Microbes That Make It All Work
When creating your starter from scratch, you’re inviting two specific types of microbes to join the party:
- Wild Yeast
These guys produce carbon dioxide—the gas that makes dough rise. They work slower than commercial yeast, but create far more flavor. - Lactic Acid Bacteria (LAB)
These helpful bacteria produce acids that give sourdough its signature tang. They also protect your starter from bad microbes and spoilage.
Together, these microbes create gas, flavor, and structure—the holy trinity of sourdough.
Sourdough Starter Is Not Just for Bread
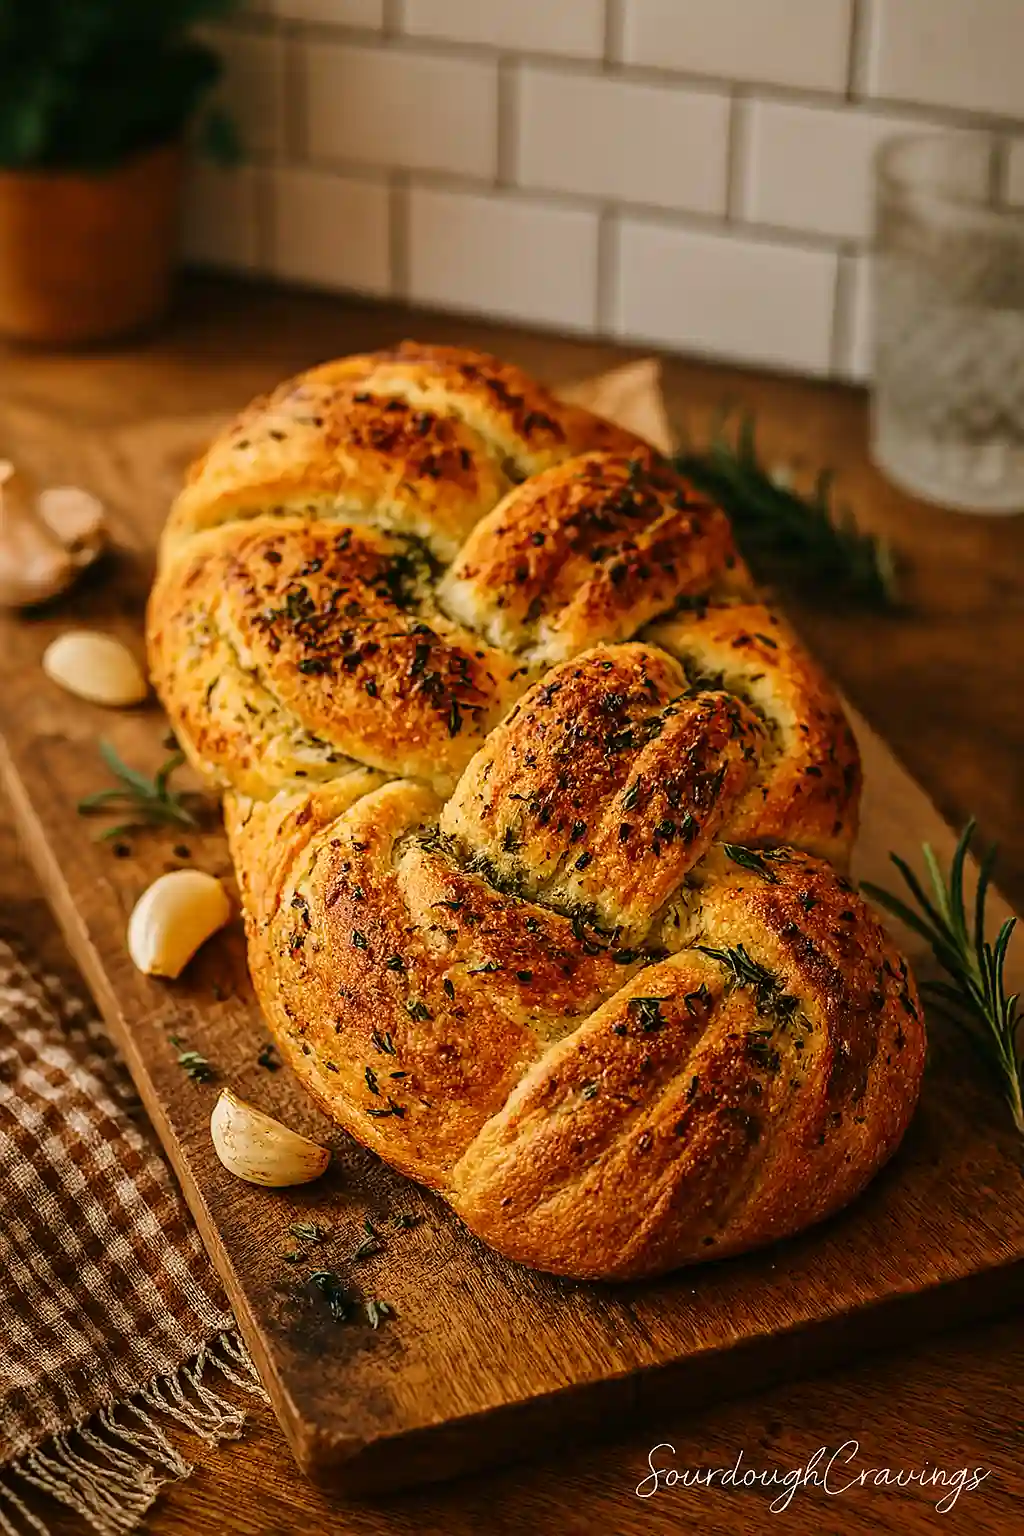
While most people associate it with sourdough loaves, a healthy starter can be used for so much more: pizza dough, crackers, pancakes, waffles, even cookies.
But before you bake, you first need a reliable starter. That’s why this guide is focused entirely on how to make a sourdough starter from scratch—without shortcuts, stress, or second guesses.
Want to go deeper into the microbiology and method behind this amazing process? Head back to the full guide: Sourdough Starter Fundamentals
Why Make Your Own Sourdough Starter?

If you’re still wondering whether it’s worth the effort to learn how to make a sourdough starter, the answer is a big, flour-dusted yes.
Sure, you could ask a friend for some of theirs or even buy dried starter online. But creating your own from scratch has huge advantages—and it’s far easier than most beginners think.
Here’s why it’s absolutely worth making your own sourdough starter:
It’s Cheap, Easy, and 100% DIY
You don’t need anything more than flour and water. That’s it. When you make your own sourdough starter at home, you avoid specialty ingredients, packaged yeast, and even delivery fees for mail-order cultures.
You’re harnessing the wild yeast that’s already on your flour and in your environment. No additives. No shipping delays. No mystery origins.
And once you’ve learned how to make a sourdough starter from scratch, you’ll never have to start over again—unless you want to.
The Flavor Is Better (And All Yours)
Every starter is unique. The wild yeast and bacteria that develop in your kitchen reflect your home’s specific environment. That means your starter has a flavor fingerprint no store-bought version can match.
When you take the time to grow your own sourdough starter, you create something that’s truly one-of-a-kind. Bakers often describe homemade starters as having more depth, milder acidity, and better rise performance—because it adapts to your kitchen from day one.
You Learn the Process—Not Just the Recipe
When you follow a recipe that uses a pre-made starter, you’re skipping one of the most rewarding parts of the sourdough experience. Learning how to make a sourdough starter from flour and water teaches you:
- How fermentation works
- What signs to look for (good and bad)
- How to troubleshoot
- How to care for living dough
This knowledge gives you confidence in every sourdough bake you’ll do from here on out. Once you’ve built it yourself, you understand it inside and out.
You’ll Never Worry About Running Out of Yeast Again
During the pandemic, many stores ran out of commercial yeast. But sourdough bakers kept baking—because their starters are self-sustaining. As long as you feed it, it lives. In fact, some starters are over 100 years old and still going strong!
Knowing how to make a sourdough starter at home gives you baking independence. It’s your secret weapon for bread, pizza, and beyond.
What You Need to Make a Sourdough Starter

Before we dive into how to make a sourdough starter, let’s get clear on one thing: you don’t need to buy any fancy equipment. In fact, one of the best parts of starting a sourdough starter at home is how shockingly simple it is.
You’ll only need a few common items from your kitchen to get started.
Basic Supplies (You Likely Already Have These)
| Item | Why You Need It |
|---|---|
| Glass jar (16–32 oz) | To hold and observe your starter |
| Flour | The food source for yeast and bacteria |
| Water | Needed to hydrate and activate microbes |
| Spoon or spatula | For mixing |
| Kitchen scale (optional) | Ensures consistent feeding ratios |
| Rubber band or marker | Helps track rising activity |
Knowing how to make a sourdough starter includes understanding that precision helps, but perfection isn’t required. A scale is useful, but even volume measurements work for beginners.
What’s the Best Flour to Use?
This is one of the most common questions I get when teaching people how to make a sourdough starter from scratch.
Here’s the short version: start with flour that contains the most wild yeast.
Recommended Starter Flours:
- Whole wheat flour – Balanced nutrition, strong fermentation
- Rye flour – Super active, ideal for getting started
- Unbleached all-purpose flour – Gentle and reliable (better for maintaining after Day 4)
Avoid bleached flour—it’s been stripped of the wild microbes that help your homemade sourdough starter thrive.
🔗 Coming Soon: [Best Flour for Sourdough Starter]
Filtered or Tap Water?
Water plays a key role in making your starter from scratch. While many tap waters work fine, some contain chlorine or chloramine, which can inhibit fermentation.
Best options for making your sourdough starter:
- Filtered water
- Bottled spring water
- Let tap water sit for 12 hours to evaporate chlorine
Room temperature water (65–75°F) is ideal when learning how to make a sourdough starter, especially during the early days.
Which Jar Works Best?
Any clean glass or food-safe plastic container will do. Look for:
- Transparent sides (so you can see bubbles and growth)
- 16 oz or larger
- Straight sides (makes rising easier to monitor)
Optional: use a rubber band to mark the starter’s height after feeding. This is helpful to measure rise—one of the first signs that your homemade sourdough starter is waking up.
Nice-to-Have Extras
These aren’t required, but they’ll make the process smoother:
- Digital kitchen thermometer
- Small spatula
- Digital scale
- Extra jars (in case of mold or overflows)
Remember, if you’re just learning how to make a sourdough starter, don’t overthink your tools. What matters most is consistency.
Coming up next: we’ll explore the science behind sourdough fermentation, so you can actually understand what’s happening inside that jar.
The Science Behind It (In Plain English)

If you’re serious about learning how to make a sourdough starter, understanding the why behind the process will make you a more confident baker.
You’re not just mixing flour and water and hoping for the best—you’re building a thriving ecosystem. Inside that jar, wild yeast and bacteria begin to consume starches in the flour and produce gases and acids. That’s fermentation. And that’s where the real magic happens.
Let’s break it down into what’s actually going on inside your starter.
How Fermentation Works (Without the Lab Coat)
When you mix flour and water, natural microbes already present in the flour (and floating in the air) start feeding on the sugars in the flour. The yeast produces carbon dioxide—which creates bubbles and causes your starter (and eventually your bread) to rise.
The lactic acid bacteria, on the other hand, produce acids that:
- Lower the pH (preserving the mixture)
- Create that distinct tangy flavor
- Prevent unwanted spoilage organisms from taking over
This balance of yeast and bacteria is what makes sourdough starter so stable, resilient, and flavorful.
What Feeding Actually Does
If you’re learning how to make a sourdough starter from scratch, the most confusing part is often the feeding schedule. Why are we discarding part of it? What’s the purpose?
Here’s the simple answer:
Every time you feed your starter with fresh flour and water, you’re giving the microbes more food. But if you never discard, the jar becomes too acidic, and the food gets diluted. Discarding resets the balance and encourages stronger, faster fermentation.
Think of it like cleaning a fish tank—you don’t want to change all the water, but you do want to keep it fresh enough for life to thrive.
Want to go deeper? Our Sourdough Starter Fundamentals guide explains feeding ratios and discard strategies in more detail.
Why Temperature Matters So Much
Microbial activity thrives between 70–75°F (21–24°C). If your kitchen is too cold, fermentation slows. Too hot? You risk sourness overload or microbial imbalance.
Tips:
- Use warm water (75–80°F) if your kitchen is cold
- Store near your stovetop, inside the oven with the light on, or in a proofing box
- Don’t panic if it’s slow to rise—consistency beats speed
Once you’ve got the hang of how to make a sourdough starter, you’ll start to notice how environmental shifts affect fermentation, flavor, and rise time.
For storage advice and ambient temperature hacks, check the guide: Sourdough Starter Fundamentals
Coming up next: we’ll jump into the hands-on process — the 7-day method for how to make a sourdough starter from scratch that actually works.
How to Make a Sourdough Starter – Day-by-Day Breakdown

Now that we’ve covered the science and supplies, let’s get into the heart of it: the actual process of how to make a sourdough starter from scratch.
This is the exact 7-day plan I’ve used to help beginners confidently grow a bubbly, active starter—no stress, no mold panic, and no guesswork. All you need is 5 minutes a day, flour, water, and consistency.
To make your life easier, I’ve embedded a fully interactive tracker below that walks you through exactly what to do and what to expect each day.
Interactive: 7-Day Sourdough Starter Tracker
Paste this into your blog’s HTML section — it’s fully mobile-friendly and expands per day:
7-Day Sourdough Starter Tracker
Day 1 – Mix & Wait
Combine 60g whole wheat flour + 60g water in a clean jar. Mix well, cover loosely, and mark the level. Let sit at room temperature (70–75°F) for 24 hours.
Day 2 – Observe
Stir once or twice. No feeding. Look for faint bubbles or subtle sour aroma. No rise yet? Totally normal.
Day 3 – First Feeding
Discard half (about 60g). Add 60g flour + 60g water. Mix thoroughly and mark the level again. First rise may appear within 12–24 hours.
Day 4 – Growth Phase
Repeat feeding. You can switch to unbleached all-purpose flour. Expect more bubbles, volume, and tangy aroma. Starter may double.
Day 5 – Rise & Fall
If your starter rises and falls consistently within 8–12 hours, it’s active. If slow, feed again and keep it warm. Use a rubber band to track growth.
Day 6 – Strengthen
Feed every 12 hours if it’s rising quickly. Expect sourdough smell, visible bubbles, and predictable volume increase. You’re nearly there!
Day 7 – Float Test & Finish
Feed one last time and let rise for 4–6 hours. Drop a spoonful in water. If it floats, it’s ready to use or refrigerate. If not, give it another day or two.
Why the 7-Day Plan Works
When you’re figuring out how to make a sourdough starter, you need structure. The starter needs time to build strength, balance its acidity, and multiply wild yeast. If you follow this 7-day rhythm, you’ll avoid most of the issues beginners face.
Each day has a role:
- Day 1–2: Wake up the microbes
- Day 3–4: Introduce feeding and grow the colony
- Day 5–6: Develop fermentation strength
- Day 7: Test and bake!
This isn’t guesswork—it’s a proven process grounded in microbial growth and baking science.
And if anything feels off during the process, don’t worry. We’ve covered dozens of solutions in our deep-dive:
[Troubleshooting Sourdough Starter Problems] (Coming Soon)
Want to understand why we discard or how long it should take to double? Head back to the master resource: Sourdough Starter Fundamentals
How to Know When Your Starter Is Ready
After following all the steps in how to make a sourdough starter, how do you know if it’s actually ready to bake with?
This is one of the most exciting (and nerve-wracking) parts of making your own sourdough starter. You’ve nurtured it, fed it, and now you’re asking: “Is it strong enough to raise dough?”
The good news? Your starter will give you clear signs if you know what to look for. Below are the key indicators that your homemade sourdough starter is mature and ready to use.
Visible Signs Your Sourdough Starter Is Ready
When you’re learning how to make a sourdough starter, you’ll notice a few important physical changes over time.
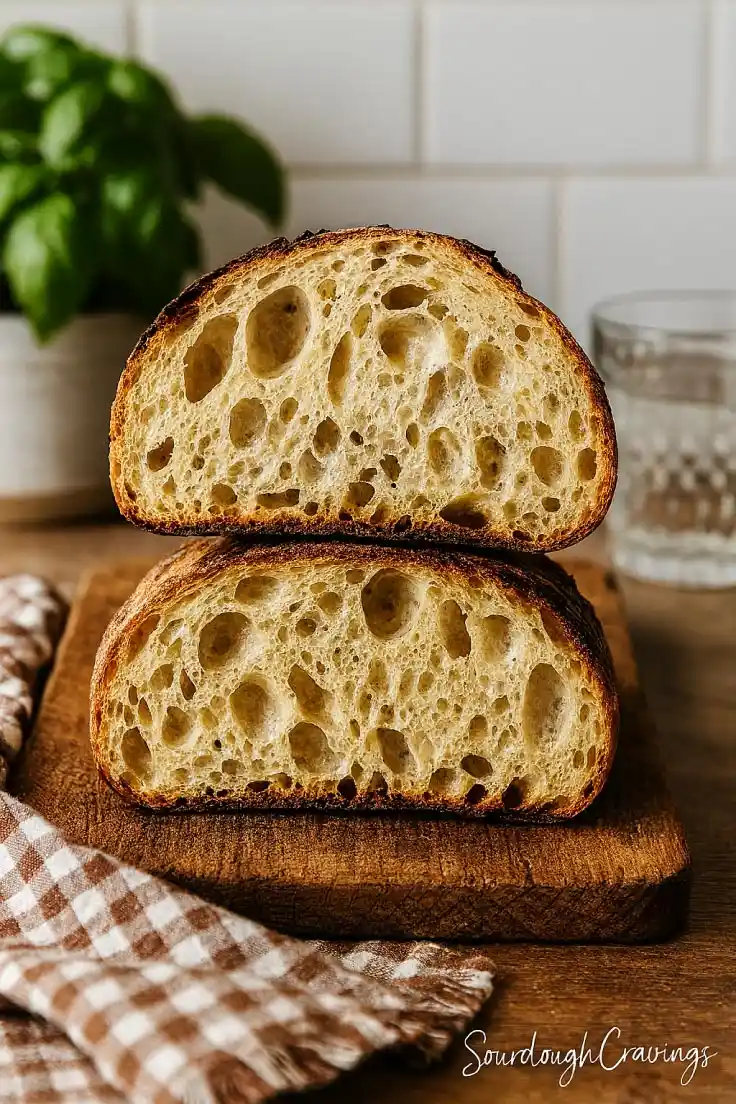
It doubles (or nearly doubles) in volume
Your starter should rise significantly within 4–6 hours after feeding. If it takes longer than 12 hours, it likely needs a few more days of feeding.
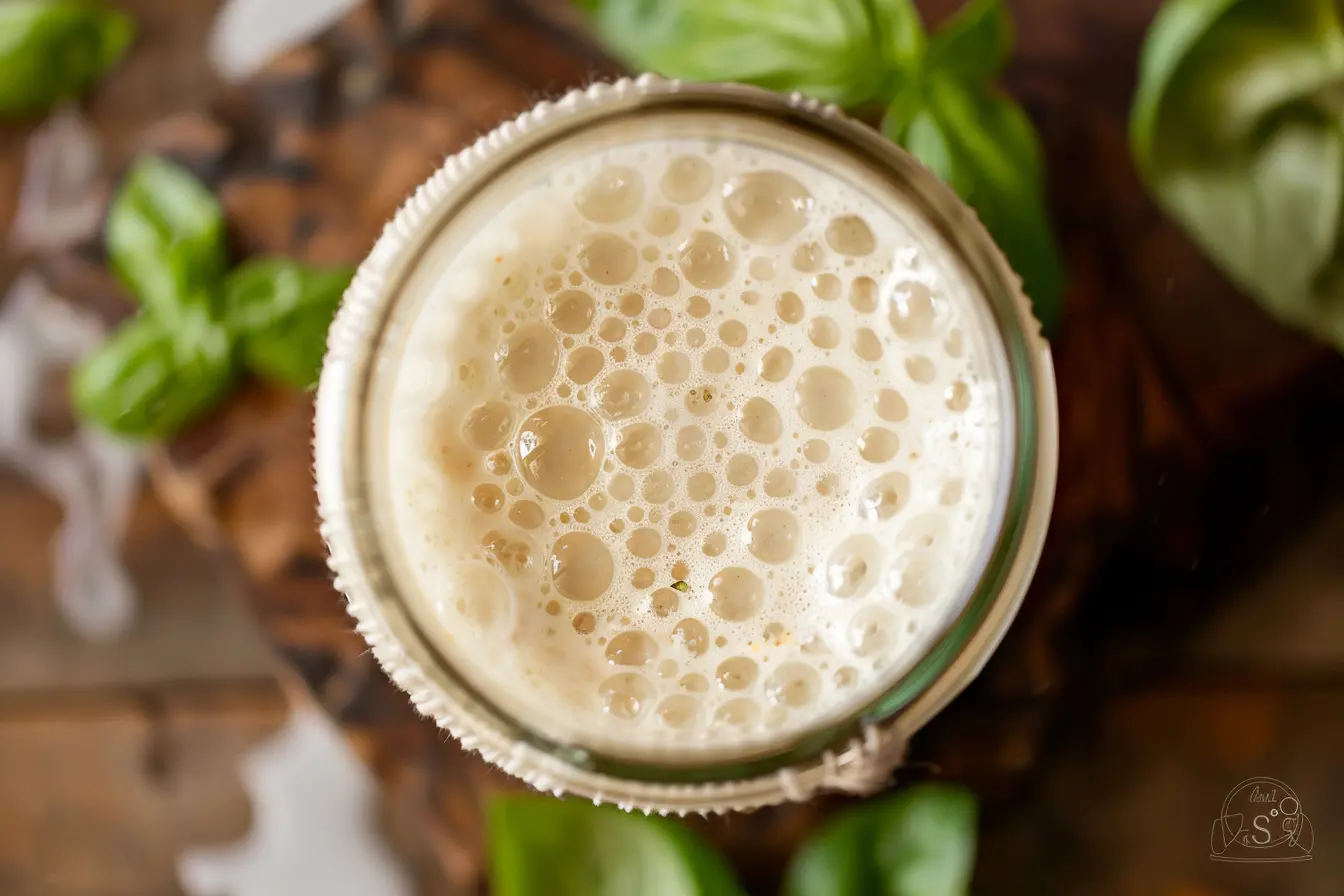
It’s full of bubbles—top to bottom
Check the sides of your jar: bubbles should appear not only on top but throughout the mixture. This shows strong fermentation.
It smells tangy, not sour or foul
A mature sourdough starter has a clean, slightly fruity or acidic smell. It shouldn’t smell like rot, cheese, or nail polish remover.
It collapses after rising
When a starter rises and then falls (leaving streaks on the jar), it means the yeast consumed all its food. That’s a classic sign of maturity.
The texture is light and mousse-like
It should feel aerated—not thick like dough, and not watery. A properly developed starter feels spongy when stirred.
These clues are incredibly helpful when you’re mastering how to make a sourdough starter from scratch and don’t want to bake with it too early.
The Float Test (Optional, but Helpful)
One of the most popular ways to test if your sourdough starter is ready is the float test.
Here’s how to do it:
- Feed your starter and let it rise at room temp (68–75°F)
- After 4–6 hours, scoop a teaspoon from the center of the jar
- Gently drop it into a cup of room-temp water
If it floats, your starter is airy and active enough to trap gas in dough—it’s ready to bake.
If it sinks, it likely needs another day or two of regular feeding.
Note: The float test can fail if the starter is stirred or deflated before scooping, even if it’s technically ready. Use it as a guide—not a strict pass/fail test.
🔗 Coming Soon: [Sourdough Starter Float Test Explained]
Still Not Sure? Wait 1–2 More Days
If your starter meets most of the signs but just isn’t quite there, don’t give up. When people struggle with how to make a sourdough starter, they often stop too early. Give it one or two more days of consistent feeding, and keep it warm.
And remember: there’s no such thing as a perfect timeline. Some starters take 10 days instead of 7—and that’s totally fine.
To troubleshoot slow starters or mild smells, check our full guide: Sourdough Starter Fundamentals
Next, I’ll walk you through exactly what to do after your starter is ready: storing it, maintaining it, and using it for the first time.
What to Do After Day 7
You’ve made it through the 7-day process. You’ve followed every step of how to make a sourdough starter, and now you’re staring at a jar full of bubbles and hope. So… what’s next?
Many beginners finish building their starter but aren’t sure how to care for it long term. Should you bake right away? Feed it every day? Store it in the fridge?
This section breaks it down into 3 easy options depending on your baking style.
Maintain and Feed (If You Bake Often)
If you plan to bake multiple times per week, keep your sourdough starter at room temperature and continue feeding it daily.
Room Temp Maintenance Schedule:
- Discard all but 50g
- Feed 50g flour + 50g water every 24 hours
- Keep at 70–75°F
This method keeps your homemade sourdough starter active and always ready to use. You’ll notice faster rise times, milder acidity, and predictable fermentation.
✅ Bonus tip: Once your starter is doubling consistently in 4–6 hours after each feeding, you’ve truly mastered how to make a sourdough starter that’s bakery-ready.
Refrigerate (If You Bake Once a Week or Less)
Most home bakers only bake on weekends. If that’s you, store your starter in the fridge.
Fridge Feeding Instructions:
- Feed as usual
- Let it sit out for 1–2 hours so fermentation starts
- Seal and refrigerate for 5–7 days
- Take it out and feed again 1 day before you bake
Cold slows fermentation but doesn’t kill the yeast. This low-maintenance approach is ideal after completing the core process of how to make a sourdough starter from scratch.
Coming Soon: [How to Store Sourdough Starter]
Coming Soon: [Refrigerator vs. Counter: Starter Storage]
Start Baking with It (Even if It’s Your First Loaf)
If your starter floats, smells right, and doubles after feeding, it’s ready to bake with. You don’t need to wait longer. Use part of it to make levain or mix directly into a sourdough recipe.
Keep in mind:
- Always save at least 50g to keep your starter alive
- Feed it again after using it, especially if baking large batches
- This first bake is part of learning how to make a sourdough starter and seeing it in action
Don’t Forget to Back It Up
Even the strongest sourdough starter can go bad if neglected or contaminated. Now that you’ve invested time into learning how to make a sourdough starter, take a few minutes to protect it:
- Dry a tablespoon on parchment and crumble into a jar
- Freeze a portion in an airtight bag or cube tray
- Give a bit to a baking buddy
This step ensures you’ll never have to start how to make a sourdough starter all over again unless you want to.
Up next, we’ll look at the most common beginner mistakes, and how to avoid them—because now that you’ve built it, you need to protect it.
Beginner Mistakes to Avoid
You’ve followed the steps for how to make a sourdough starter, but let’s be honest—this is still fermentation, and it’s normal to run into a few hiccups.
Whether you’re brand new to the process or this is your third attempt, avoiding these beginner pitfalls will make your sourdough journey smoother and more successful.
These are the most common sourdough starter mistakes—and how to fix them.
Feeding Too Much or Too Infrequently
One of the most common errors in how to make a sourdough starter is overfeeding or skipping days. If you feed too often without signs of activity, you’re diluting the microbial population before it stabilizes. If you feed too infrequently, acidity builds and weakens the yeast.
Fix: Stick to a 24-hour feeding schedule for the first 5 days. Once your starter rises and falls within 6–8 hours, you can feed more often or refrigerate as needed.
King Arthur’s starter feeding tips explain this concept beautifully for bakers of all levels.
Using Bleached or Poor-Quality Flour
If you want to master how to make a sourdough starter, don’t start with poor fuel. Bleached flours often have chemicals that kill wild yeast and bacteria, preventing a strong ferment.
Fix: Use unbleached all-purpose or whole wheat flour, especially in the early days. Rye flour is also excellent for fast activity.
🔗 Coming Soon: [Best Flour for Sourdough Starter]
Keeping It Too Cold
Temperature is everything. One reason beginners struggle with how to make a sourdough starter is fermentation delay from a cold kitchen. If your starter sits below 65°F, it may take twice as long to become active.
✅ Fix: Keep your starter near a warm appliance, inside a turned-off oven with the light on, or use warm water (75–80°F) when mixing.
This Cultures for Health guide dives deeper into optimal temperature ranges for sourdough success.
Confusing Hooch with Mold
Dark liquid on top of your starter? It’s called hooch—a sign your starter is hungry, not moldy.
Fix: Stir it back in or pour it off and feed as usual. Hooch is totally normal, especially during slower phases of making a sourdough starter from scratch.
Mold, however, is fuzzy, colored (pink, green, black), and usually smells foul. If you see that, discard and start again.
Giving Up Too Early
This is the #1 reason people fail at how to make a sourdough starter. You expect overnight results, and when you don’t see rise on Day 3, you assume something’s wrong. In reality, some starters take 10 days or more to reach full strength.
Fix: Stay consistent, trust the process, and use visual cues—not the calendar—to judge readiness.
If in doubt, refer back to the Sourdough Starter Fundamentals Pillar Page to double-check signs, smells, and timing.
Up next: I’ll cover one of the most rewarding parts of sourdough—what to do with your discard, and how it can be used creatively while feeding your starter.
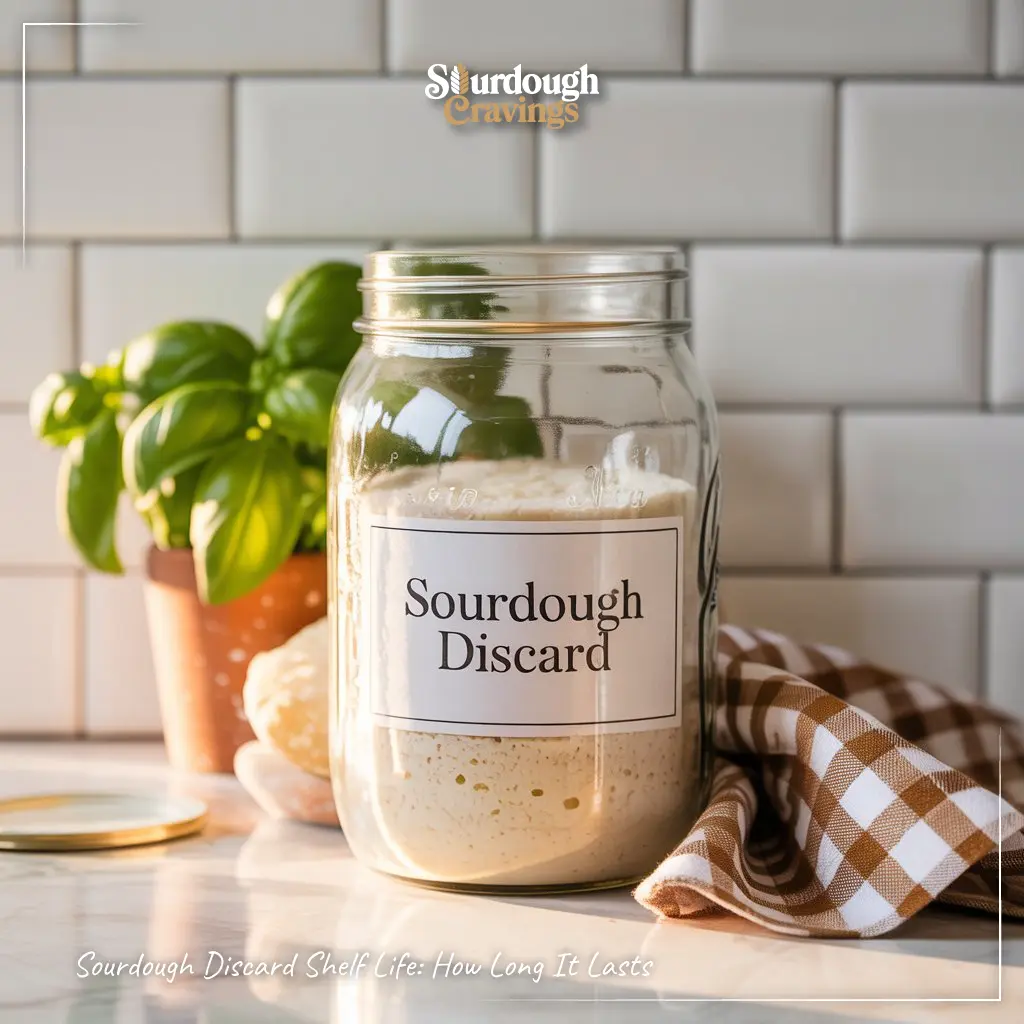
What to Do with Discard
If you’ve followed the process of how to make a sourdough starter, you’ve probably noticed that by Day 3 or 4, you’re discarding a portion of your mixture every day. And if you’re like most new bakers, your first thought is, “Wait—am I just throwing this out?”
Short answer: not at all.
Sourdough discard is still packed with flavor and microbial activity. While it may not be strong enough to raise bread yet, it’s perfect for other baked goods and beginner recipes.
Understanding how to use discard is an important (and fun!) part of learning how to make a sourdough starter from scratch.
What Is Sourdough Discard?
Sourdough discard is the portion of starter you remove before each feeding. This keeps your starter from becoming too large and helps maintain the proper balance of yeast, bacteria, and acidity.
Discard is completely safe to use unless:
- It has visible mold
- It’s been unrefrigerated for days
- It smells truly rotten (not just tangy or boozy)
When handled right, it’s a flavorful, fermented addition to recipes.
Easy Ways to Use Discard (Before It Goes to Waste)
When you’re practicing how to make a sourdough starter, you’ll accumulate a lot of discard in the first week. Here’s how to put it to good use:
Sourdough Pancakes or Waffles
Quick, fluffy, and full of flavor—no additional leavening required. Add an egg and some baking soda, and you’re golden.
Discard Chocolate Chip Cookies
Slightly tangy and chewy with a complex depth of flavor. Great for freezer batches.
Sourdough Pizza Dough
Even young discard adds tang to homemade pizza crusts. Let it ferment overnight for better elasticity.
Muffins, Crackers, Banana Bread
Add a few tablespoons of discard to quick breads and bakes. The acidity balances sweetness beautifully.
How to Store Discard Safely
If you’re not baking daily, collect your discard in a jar and store it in the fridge. It will keep for up to a week. You can even freeze discard in small portions for future use.
Tip: Label your jar by date so you use the oldest discard first.
Learning how to make a sourdough starter isn’t just about fermentation—it’s about sustainability, too. Using discard creatively saves waste, money, and gives you an excuse to bake even more.
Key Takeaways & Next Steps
If you’ve followed this complete guide on how to make a sourdough starter, congratulations—you’re now part of a time-honored tradition that connects home bakers across centuries.
You’ve mixed, waited, fed, and watched your wild yeast come to life. Whether it took 7 days or 10, you’ve now experienced firsthand how to make a sourdough starter that’s alive, active, and ready to bake.
Let’s lock it in with a quick recap and your next moves.
Quick Recap: How to Make a Sourdough Starter
Learning how to make a sourdough starter is a process that rewards patience and consistency. Here’s what you did:
- You combined simple ingredients—flour and water
- You activated natural yeast through daily feeding and discarding
- You tracked fermentation signs: bubbling, rising, aroma, float test
- You built a living culture that doesn’t rely on commercial yeast
- You learned how discard works, how to feed regularly, and how to keep it healthy
Every step reinforced the core goal: understanding how to make a sourdough starter from scratch and how to maintain it with confidence.
What’s Next on Your Sourdough Journey
Once you’ve learned how to make a sourdough starter, you’ve opened the door to endless sourdough baking.
Here are your next steps:
- Maintain it – daily or weekly feedings depending on your baking routine
- Use it – in breads, pancakes, pizza dough, muffins, cookies, and more
- Explore techniques – like building a levain or scaling for batch bakes
- Store it properly – in the fridge, counter, or even freeze it for travel
- Stay consistent – with feeding ratios, storage habits, and discard use
To stay on track, don’t forget to revisit the full Sourdough Starter Fundamentals guide whenever you need to troubleshoot or dive deeper.
Keep Learning (Supporting Articles – Coming Soon)
To go further than just how to make a sourdough starter, explore these upcoming tutorials:
- 🔗 [How to Feed Your Sourdough Starter] (Coming Soon)
- 🔗 [Sourdough Starter Float Test Explained] (Coming Soon)
- 🔗 [How to Store Sourdough Starter] (Coming Soon)
- 🔗 [Sourdough Starter Discard Recipes] (Coming Soon)
Each of these will build on your new skills and help ensure your starter stays strong and flexible for all your baking goals.
Bonus: Download the Starter Success PDF
To help you keep your starter healthy, we’ve created a one-page printable PDF that includes:
- The full 7-day starter plan
- Feeding ratios and schedules
- Signs your starter is ready
- Storage and discard tips
Download the “How to Make a Sourdough Starter” PDF Checklist
Final Thought
The truth is, once you learn how to make a sourdough starter, you’ve created something that can last a lifetime—or even generations. Your starter is a living part of your kitchen. It teaches patience, intuition, and craft.
Whether you bake once a week or every day, this humble mix of flour and water will become the foundation of some of the most rewarding food you’ll ever make.
So feed it, use it, trust it—and bake boldly. with love, and bake something incredible.